This article explains how to register an application in Azure Active Directory to give access to Graph APIs.
The following steps will generate the Client Id, the Client Secret, the Private Key, and the Password needed in your Cloudiway connectors.
Step 1: Create the Certificate for the new Application.
Using PowerShell, follow the below command lines to create your certificate.
$certname = "{certificateName}"    ## Replace {certificateName}
$cert = New-SelfSignedCertificate -Subject "CN=$certname" -CertStoreLocation "Cert:\CurrentUser\My" -KeyExportPolicy Exportable -KeySpec Signature -KeyLength 2048 -KeyAlgorithm RSA -HashAlgorithm SHA256
Export the certificate (.cer).
Export-Certificate -Cert $cert -FilePath "C:\Users\admin\Desktop\$certname.cer" ## Specify your preferred location
Step 2: Create the Private key with a Password for Cloudiway’s platform.
Execute the following command lines to define your password.
$mypwd = ConvertTo-SecureString -String "{myPassword}" -Force -AsPlainText ## Replace {myPassword}
Export the Private key (.pfx).
Export-PfxCertificate -Cert $cert -FilePath "C:\Users\admin\Desktop\$certname.pfx" -Password $mypwd ## Specify your preferred location
You can find the complete article here.
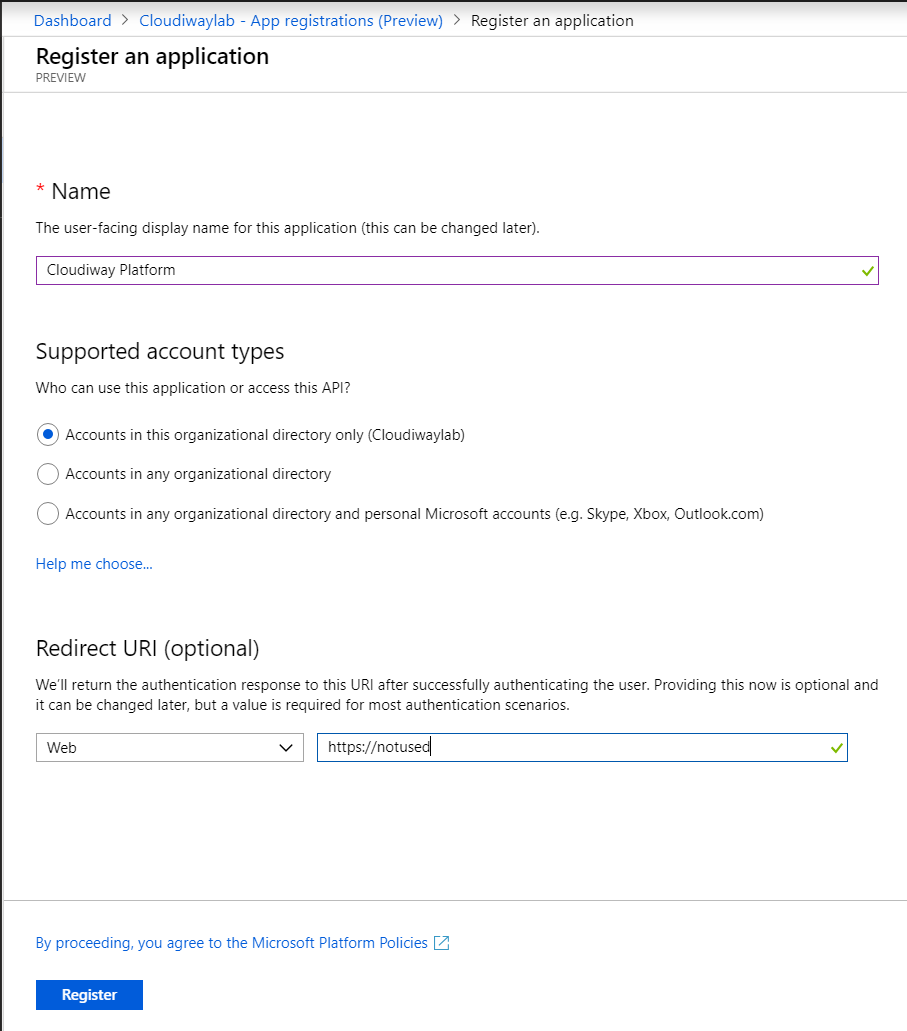
Step 3: Create a new Application.
Log in to the Azure portal using your Office 365 administrator account.
- Go to https://portal.azure.com
- Select Azure Active Directory
- Click on App Registration
- Click on New Registration
Give a name to the application.
Supported Account types: Select Accounts in their Organizational directory Only
To migrate direct messages from Teams to Teams you need to add these two redirect links:
- https://portal. cloudiway.com/teams/callback
- https://portal.cloudiway.com/connector
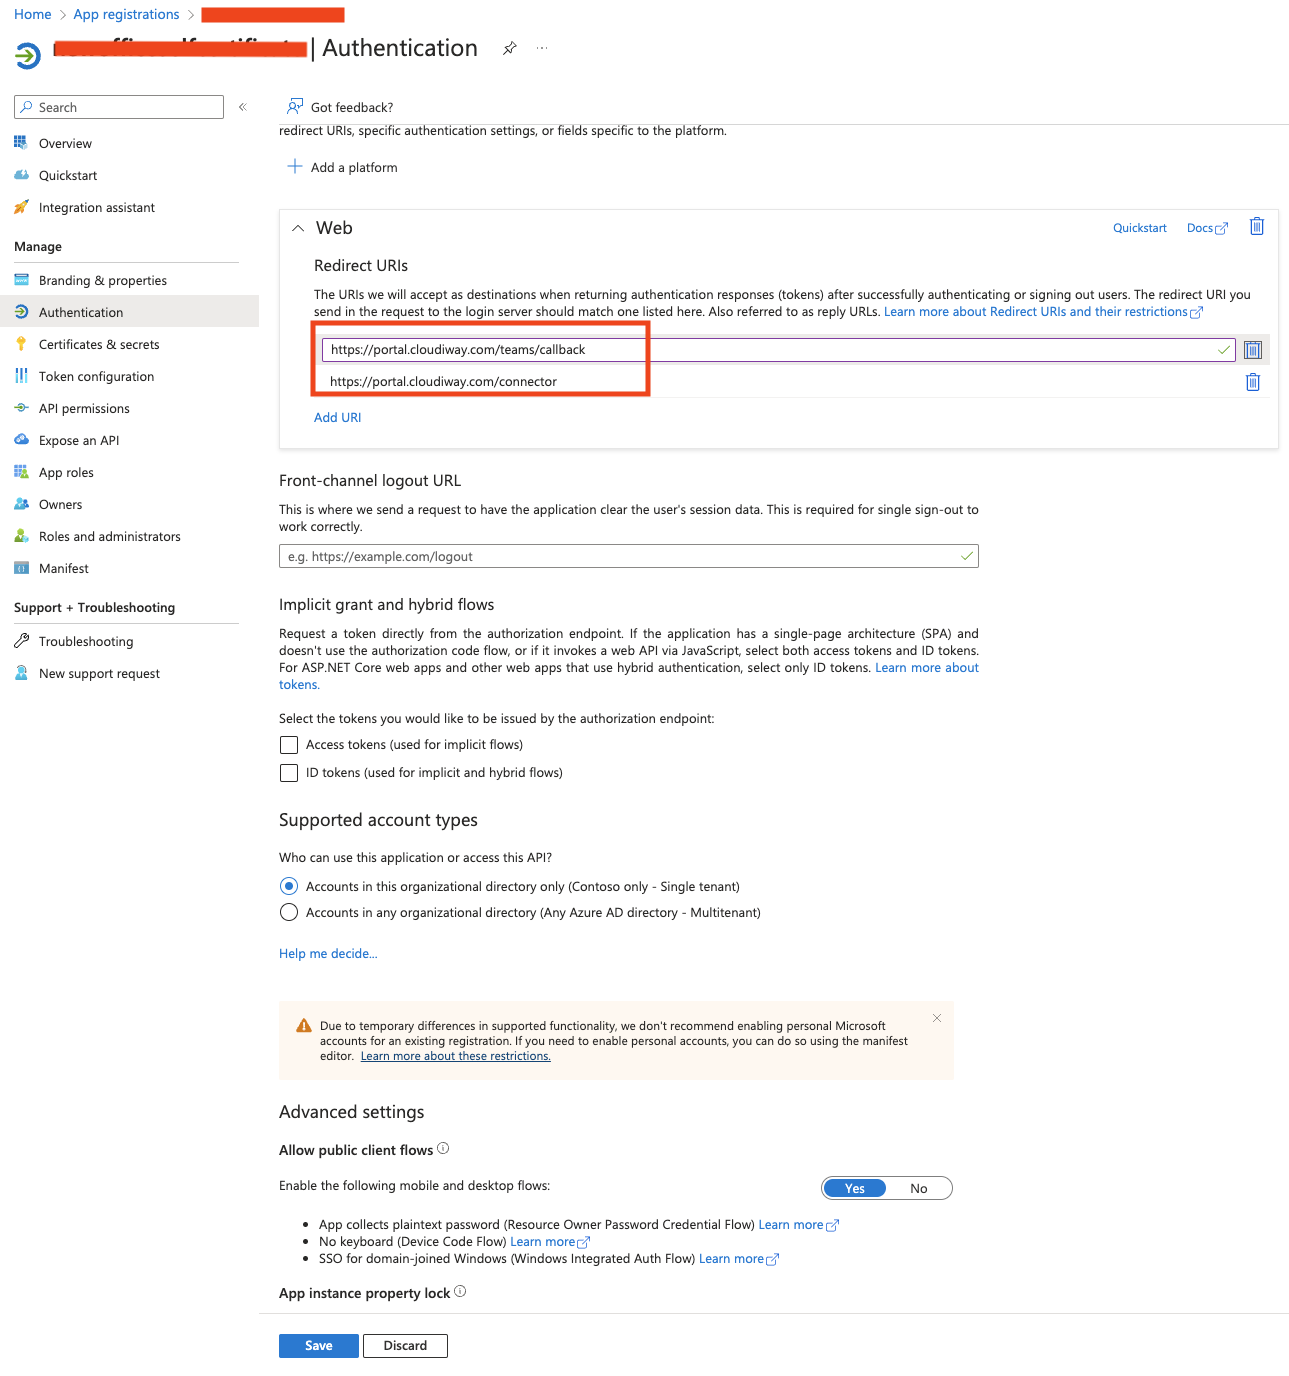
In other cases, the redirect URL is not used. Enter any value. I.e https://notused
Click On Register.
Create a New Secret.
- Click on Certificates and Secrets
- Click On New Client Secret
Enter a description, an expiration date, and Click Add
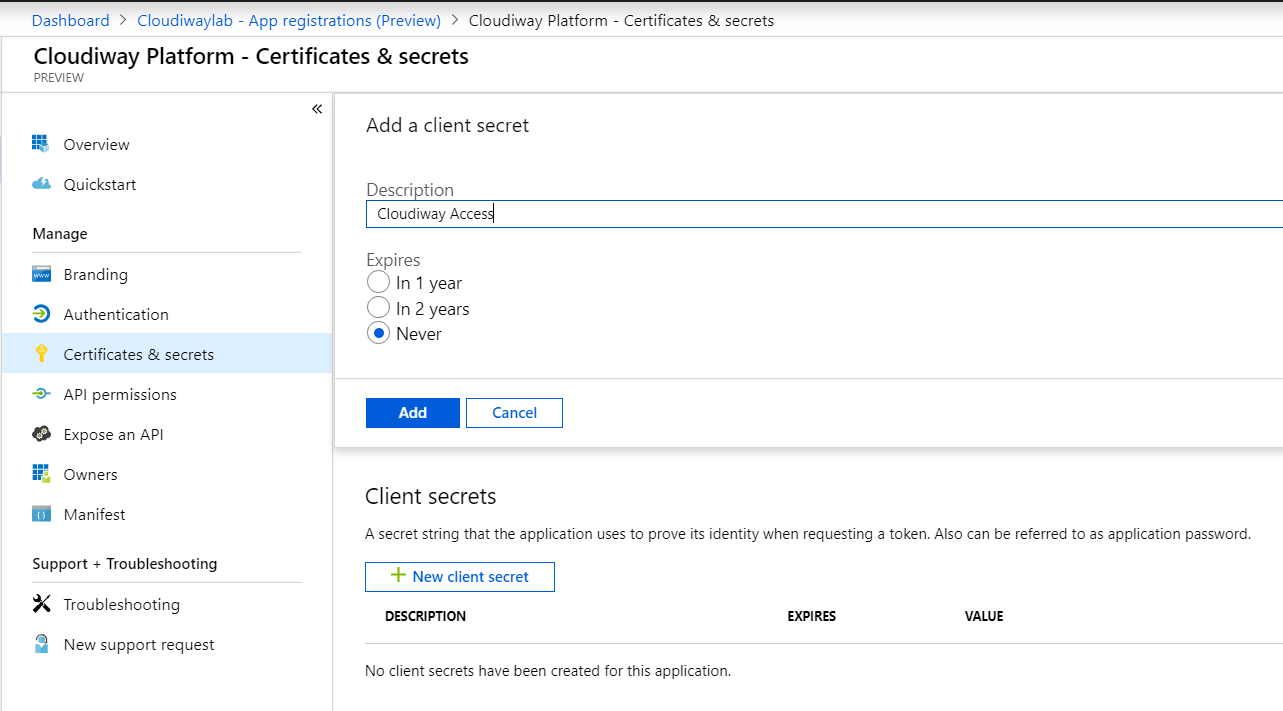
Save the client’s secret!
At this step, the Application is created.
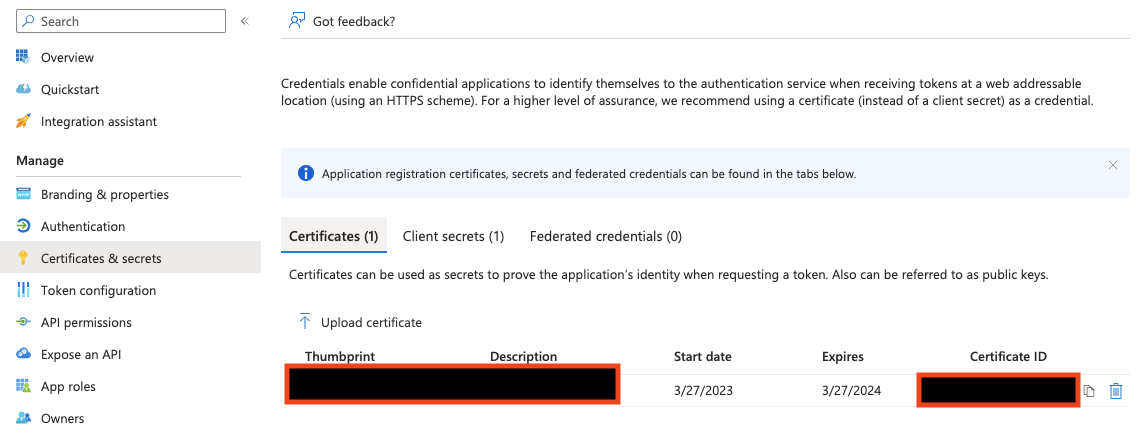
Upload the Certificate.
- Click on Certificates and Secrets
- Click on Certificates
- Click on Upload Certificate
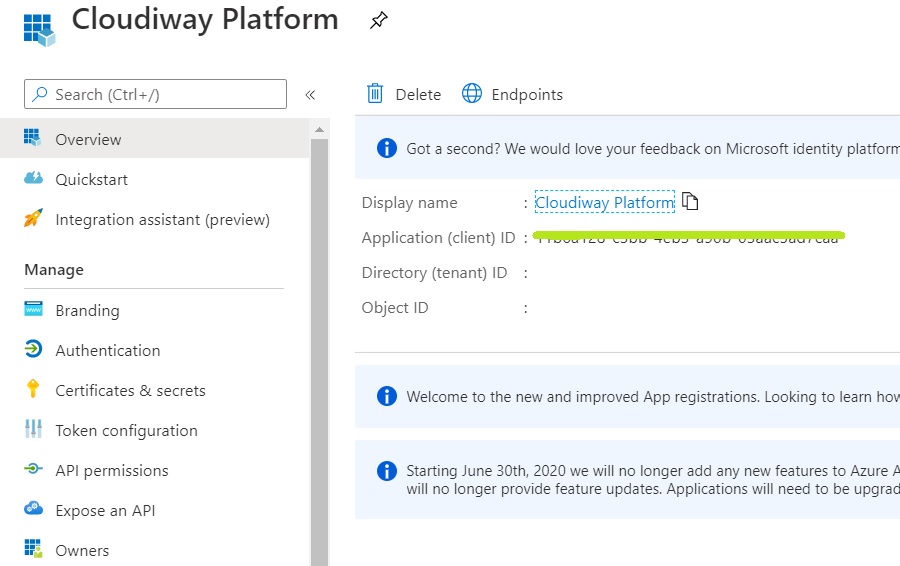
Go to the Overview section. Save your Client ID:
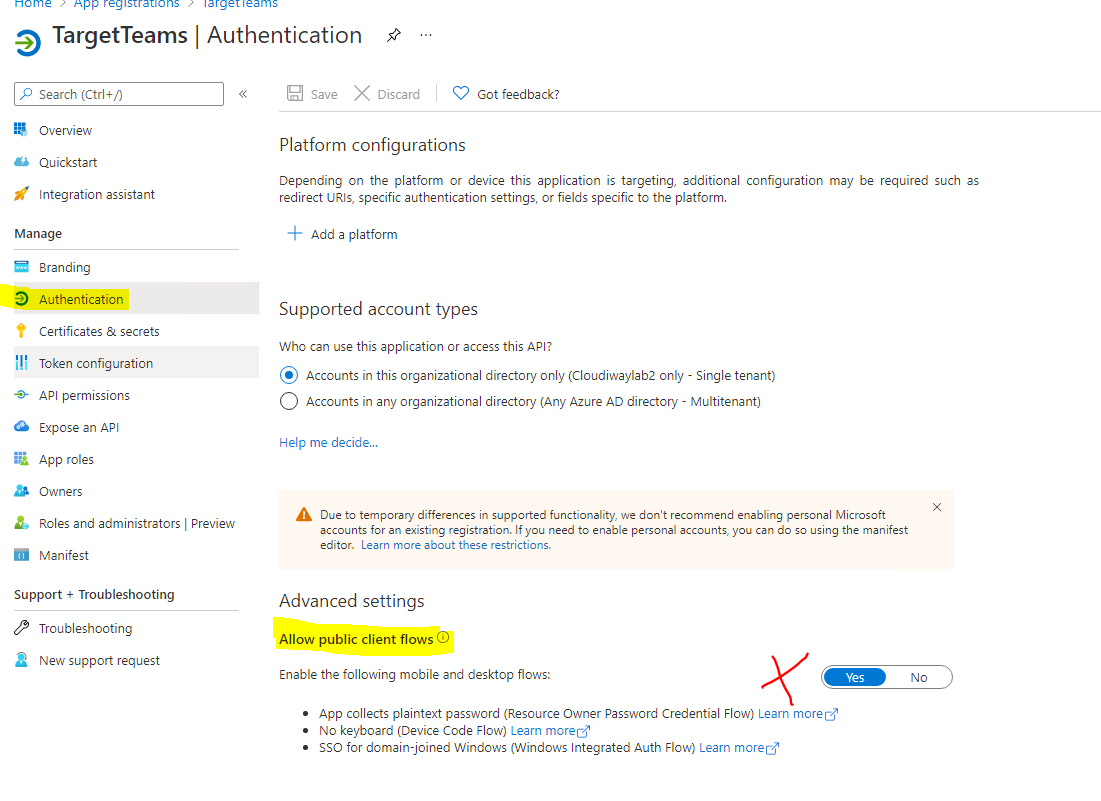
The last step before the Graph API Permissions, don’t forget to enable the “Allow public client flows” in the Authentication
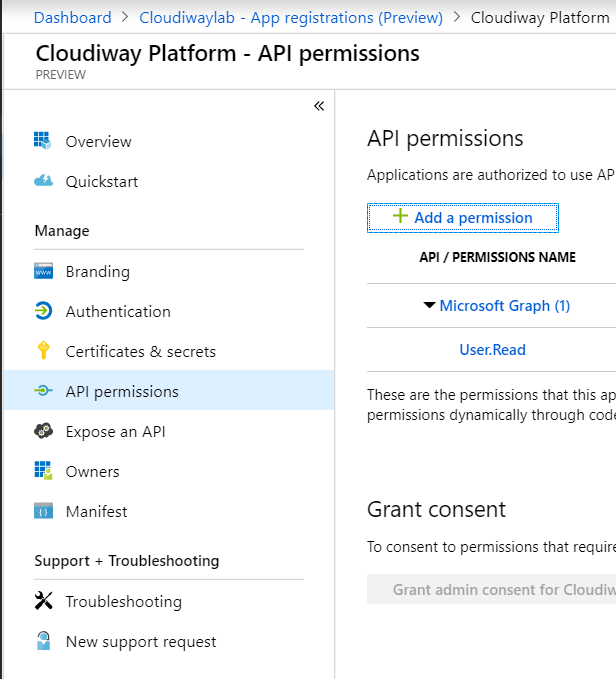
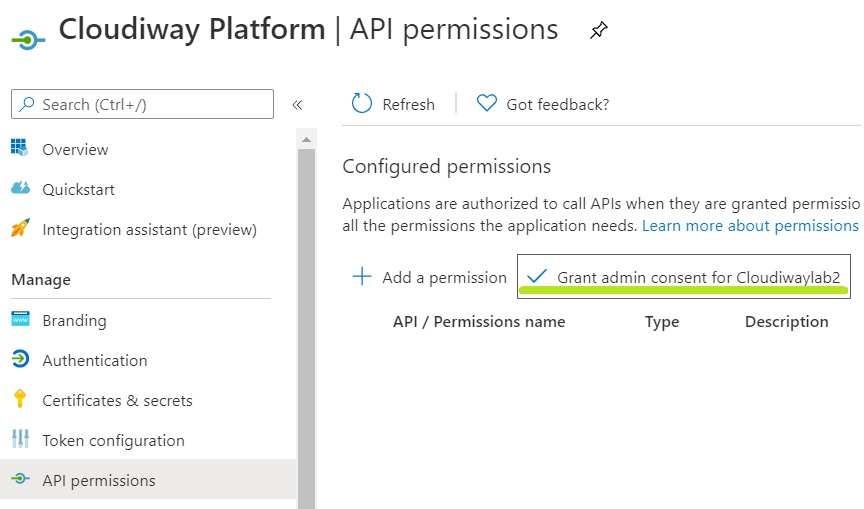
Step 4: Graph API Permissions
- Click On API Permissions
- Click on Add a permission
Permissions for Microsoft Graph API
| Connector | Graph API | Source | Target |
|---|---|---|---|
| GALSync | Microsoft Graph | Directory.Read.All Group.Read.All User.Read.All OrgContact.Read.All To enable the modification of Guest or Mail user: User.ReadWrite.All To create items as Guests: User.Invite.All | |
| Free/Busy | Microsoft Graph | Calendars.Read | |
| Microsoft Graph | Directory.Read.All Group.Read.All | Directory.Read.All Group.ReadWrite.All |
|
| Office 365 Exchange Online | full_access_as_app ** | full_access_as_app ** | |
| OneDrive | Microsoft Graph | Directory.Read.All Files.Read.All Sites.Read.All Group.Read.All User.Read.All | Directory.Read.All Files.ReadWrite.All Sites.ReadWrite.All Sites.FullControl.All Group.ReadWrite.All User.Read.All |
| Teams | Microsoft Graph | ChannelMember.ReadWrite.All ChannelMessage.Read.All (Delegated) ChannelMessage.Read.All Chat.Read ChatMember.Read (Delegated) Chat.Read ChatMessage.Read (Delegated) Directory.Read.All Files.Read.All (Delegated) Files.Read.All Group.Read.All (Delegated) Group.Read.All Group.ReadWrite.All * Group.ReadWrite.All GroupMember.Read.All (Delegated) Sites.Read.All (Delegated) Sites.Read.All User.Read.All Tasks.Read.All | Directory.Read.All Files.ReadWrite.All Group.ReadWrite.All Group.ReadWrite.All (Delegated) Sites.ReadWrite.All User.ReadWrite.All OrgContact.Read.All Calendars.Read User.Invite All Tasks. ReadWrite.All Channel.Create ChannelMember.ReadWrite.All ChannelSettings.ReadWrite.All Chat.Read.All Chat.ReadWrite (Delegated) ChatMember.ReadWrite.All Sites.FullControl.All Teamwork.Migrate.All TeamsTab.ReadWrite.All |
| Office 365 Exchange Online | full_access_as_app ** | full_access_as_app ** | |
| SharePoint | Microsoft Graph | Directory.Read.All Files.Read.All Group.Read.All Group.ReadWrite.All * Sites.Read.All User.Read.All | Directory.Read.All Files.ReadWrite.All Group.ReadWrite.All Sites.ReadWrite.All User.ReadWrite.All |
| Signature | Microsoft Graph | User.Read.All Group.Read.All User.Read | |
| Google Groups | Office 365 Exchange Online | full_access_as_app ** |
Permissions for SharePoint Online
| Connector | SharePoint API | Source | Target |
|---|---|---|---|
| Sharepoint | Sites.FullControl.All User.Read.All Sites.Read.All | User. ReadWrite.All Sites.FullControl.All TermStore.ReadWrite.All |
|
| OneDrive | Sites.FullControl.All User.Read.All Sites.Read.All | User.ReadWrite.All Sites.Read.All |
|
* The migration account needs to be the Owner and Member of the Group/Team in the source and the target. If it is not the Owner and Member of the Team, the migration engine will add it automatically with the permission Group.ReadWrite.All.
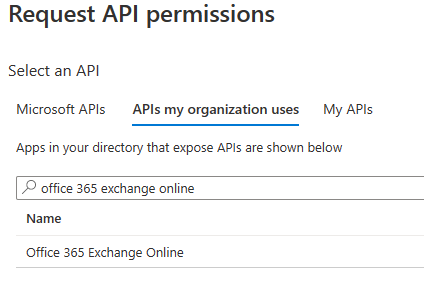
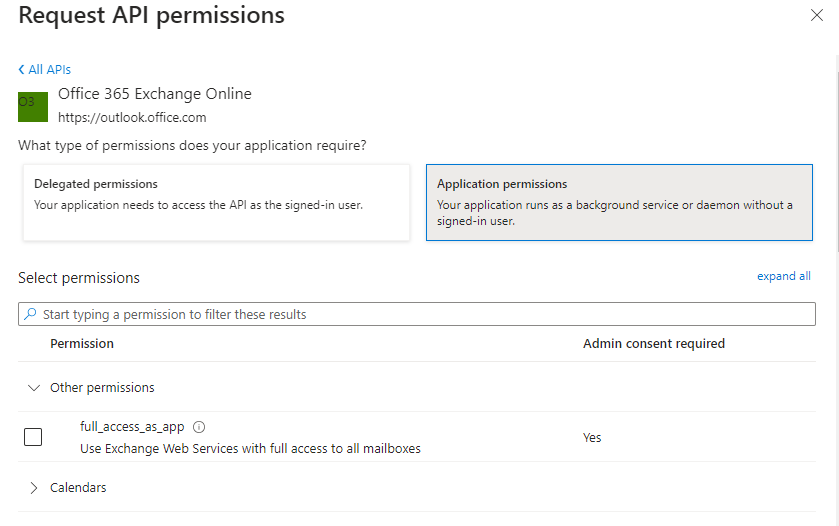
** The process for adding the EWS scopes is slightly different :
- select Add a permission.
- In the Request API permissions window, select APIs my organization uses, search for
Office 365 Exchange Online, and then select it.
- Select Application permissions.
- Under Select permissions, expand Other permissions and select full_access_as_app
Check out our video:
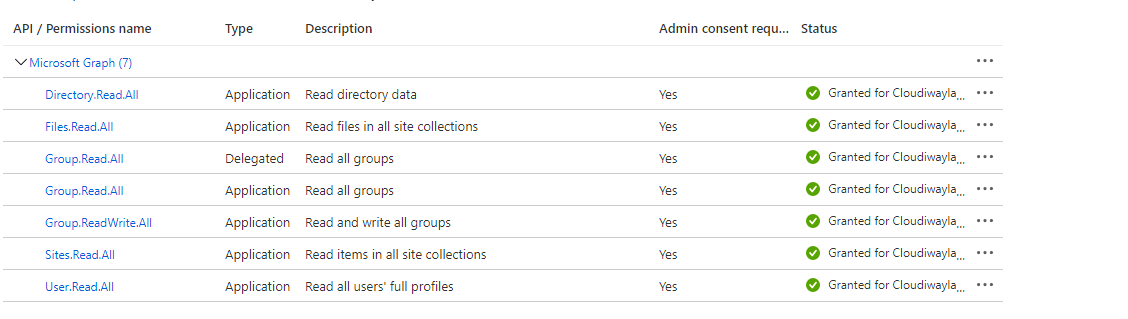
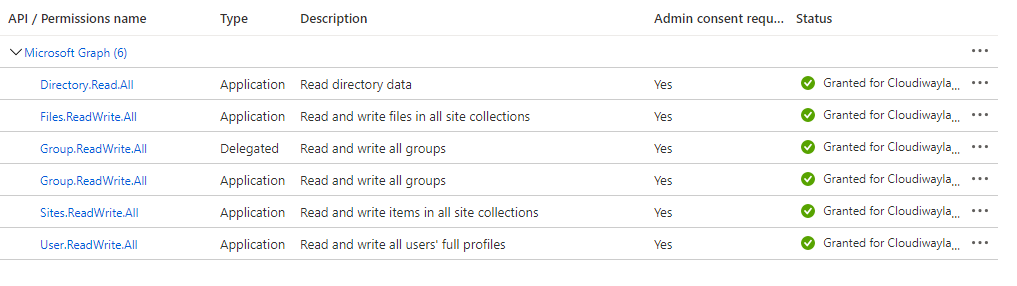
These are samples of how APIs permissions should look for source and target :
Source >
Target >
- To add permission, click on Microsoft Graph or SharePoint in the list, select Application permissions, and add the relevant permissions.

- When all the permissions are added, close the API select window, click on Grant admin consent.
You’re all set! All you need to do is provide the Client Id, the Client Secret, the Private Key, and the Password in your connector!
Product:
Cloudiway Cloud Migration Platform for Google Workspace to Microsoft 365
Cloudiway Cloud Migration Platform for Microsoft 365 to Google Workspace