This articles applies to the GalSync product to synchronize Global address lists between On-Premises and Google Workspace or Microsoft 365.
When setting up your GALSync on-prem project, you may find that it is beneficial to synchronize specific OU’s rather than use the built-in filtering options available in the Cloudiway tool. This is achievable by editing the PullUsers.ps1 file after you have installed the local Cloudiway GALSync agent in your environment.
Note: GALSync initial setup assistance is included in your subscription. Please be sure to engage Cloudiway Consulting Services before setting up GALSync in your environment.
The following steps require working knowledge of PowerShell, that you have the proper administrative access to run PowerShell commands, and that you have the necessary PowerShell cmdlets already set up in your environment. Your version of PowerShell, Exchange, and Active Directory may not support the steps described in this document. Cloudiway does not provide support for PowerShell. Please see Microsoft documentation for support – https://docs.microsoft.com/en-us/powershell/module/exchange/get-mailuser?view=exchange-ps
After installing the Cloudiway “GALSync LocalAgent,” you will find a file called PullUsers.ps1 in the default installation path – C:\Program Files (x86)\Cloudiway\GalSync LocalAgent.
Right-Click on that file and select Edit.
Search the file for the “Get-MailUser” PowerShell command.
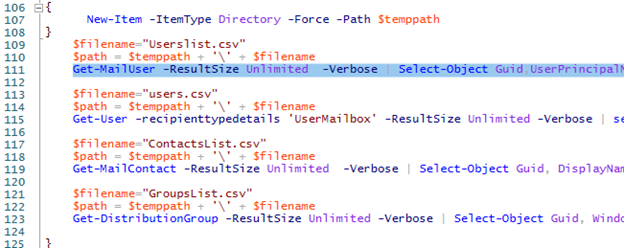
The default command is:
Get-MailUser -ResultSize Unlimited -Verbose | Select-Object Guid,UserPrincipalName,SamAccountName,WindowsEmailAddress,City,Company,CountryOrRegion,Department,DisplayName,Fax,FirstName,LastName,HomePhone,MobilePhone,Office,Phone,PostalCode,StateOrProvince,@{l=’StreetAddress’;e={$_.StreetAddress -replace “`n”,” “}},Title,EmailAddresses -Verbose | Export-Csv -Path $path -Verbose
To synchronize a specific OU add an OU to this command by adding the [-OrganizationalUnit <OrganizationalUnitIdParameter>] just after “Get-MailUser”.
Example:
Get-MailUser -OrganizationalUnit “OU=User Accounts 1,OU=Company Users,DC=domain,DC=com” -ResultSize Unlimited -Verbose | Select-Object Guid,UserPrincipalName,SamAccountName,WindowsEmailAddress,City,Company,CountryOrRegion,Department,DisplayName,Fax,FirstName,LastName,HomePhone,MobilePhone,Office,Phone,PostalCode,StateOrProvince,@{l=’StreetAddress’;e={$_.StreetAddress -replace “`n”,” “}},Title,EmailAddresses -Verbose | Export-Csv -Path $path -Verbose
Note that “OU=User Accounts 1,OU=Company Users,DC=domain,DC=com” must be replaced with your OU that you want to synchronize.
To add multiple OU’s, use this syntax on separate lines in the PullUsers.pst1 file and add the -append function at the end of the command:
Get-MailUser -OrganizationalUnit “OU=User Accounts 1,OU=Company Users,DC=domain,DC=com” -ResultSize Unlimited -Verbose | Select-Object Guid,UserPrincipalName,SamAccountName,WindowsEmailAddress,City,Company,CountryOrRegion,Department,DisplayName,Fax,FirstName,LastName,HomePhone,MobilePhone,Office,Phone,PostalCode,StateOrProvince,@{l=’StreetAddress’;e={$_.StreetAddress -replace “`n”,” “}},Title,EmailAddresses -Verbose | Export-Csv -Path $path -Verbose
Get-MailUser -OrganizationalUnit “OU=User Accounts 2,OU=Company Users,DC=domain,DC=com” -ResultSize Unlimited -Verbose | Select-Object Guid,UserPrincipalName,SamAccountName,WindowsEmailAddress,City,Company,CountryOrRegion,Department,DisplayName,Fax,FirstName,LastName,HomePhone,MobilePhone,Office,Phone,PostalCode,StateOrProvince,@{l=’StreetAddress’;e={$_.StreetAddress -replace “`n”,” “}},Title,EmailAddresses -Verbose | Export-Csv -Path $path -Verbose -append
Get-MailUser -OrganizationalUnit “OU=User Accounts 3,OU=Company Users,DC=domain,DC=com” -ResultSize Unlimited -Verbose | Select-Object Guid,UserPrincipalName,SamAccountName,WindowsEmailAddress,City,Company,CountryOrRegion,Department,DisplayName,Fax,FirstName,LastName,HomePhone,MobilePhone,Office,Phone,PostalCode,StateOrProvince,@{l=’StreetAddress’;e={$_.StreetAddress -replace “`n”,” “}},Title,EmailAddresses -Verbose | Export-Csv -Path $path -Verbose -append

The -append function is necessary to ensure that each command does not overwrite the Export-Csv file, but rather adds to the file.

When you are finished editing, save the PullUsers.ps1 file.