Dropbox Connector Configuration
Set up the Dropbox connector to migrate files to Google Drive, OneDrive, SharePoint, Teams, or Azure Blob Storage.
Overview
The Dropbox connector enables migration from Dropbox Business to various cloud destinations. Cloudiway offers two configuration methods: automatic (recommended for most users) and manual (for advanced control).
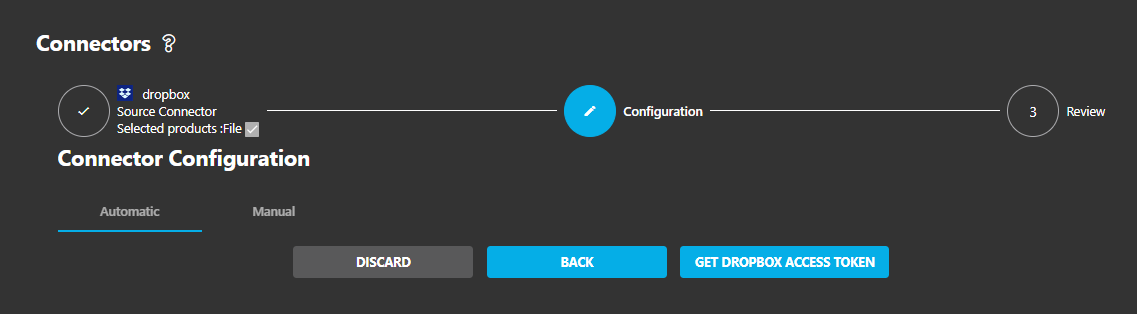
Automatic Configuration
The automatic method is the simplest approach and is recommended for most users.
Steps
- 1 Create a new connector
In Cloudiway, go to Connectors and click "New Connector"
- 2 Select Dropbox
Choose "Dropbox" as the connector type
- 3 Get Dropbox Access Token
Click "Get DROPBOX ACCESS TOKEN" button
- 4 Authorize Cloudiway
You'll be redirected to Dropbox. Log in with your administrator account and approve the permissions.
- 5 Complete Setup
The connector is automatically configured after authorization.
Recommended Method
The automatic configuration is sufficient for most migration scenarios. Use manual configuration only if you need specific control over the Dropbox app settings.
Manual Configuration
For advanced users who need full control over the Dropbox application, follow this two-stage process.
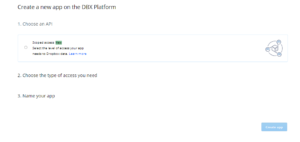
Stage 1: Create Dropbox Application
- 1 Access Developer Portal
- 2 Create New App
Click "Create app" and configure:
- • API: Scoped access
- • Access type: Full Dropbox
- • Name: Your preferred app name
- 3 Note Credentials
From the Settings tab, copy:
- • App key (Client ID)
- • App secret (Client Secret)
- 4 Add Redirect URI
Add
http://localhostto OAuth2 redirect URIs
Stage 2: Generate Refresh Token
- 1 Construct Authorization URL
Open this URL in your browser (replace YOUR_CLIENT_ID):
https://www.dropbox.com/oauth2/authorize?client_id=YOUR_CLIENT_ID&response_type=code&token_access_type=offline - 2 Get Authorization Code
Authorize the app and copy the authorization code displayed.
- 3 Exchange for Refresh Token
Use Postman or curl to make a POST request:
POST https://api.dropboxapi.com/oauth2/token
Content-Type: application/x-www-form-urlencoded

code=YOUR_AUTH_CODE
&grant_type=authorization_code
&client_id=YOUR_CLIENT_ID
&client_secret=YOUR_CLIENT_SECRET
- 4 Save Refresh Token
Copy the
refresh_tokenfrom the response.
Keep Credentials Secure
Never share your Client Secret or Refresh Token. These provide full access to your Dropbox account.
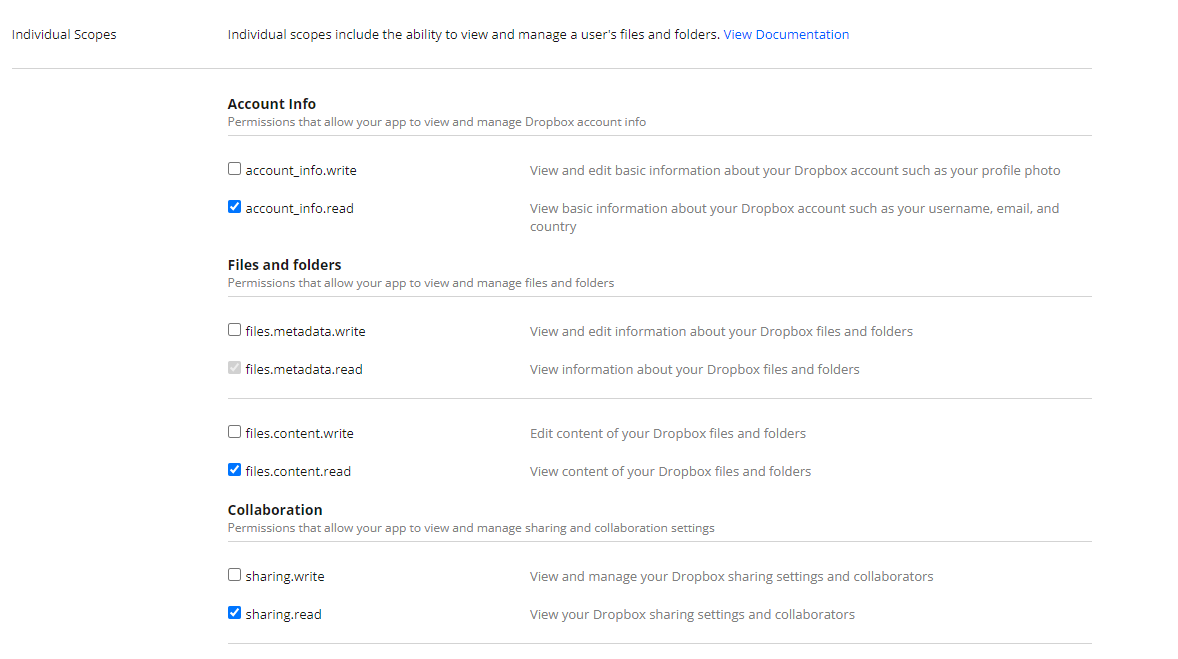
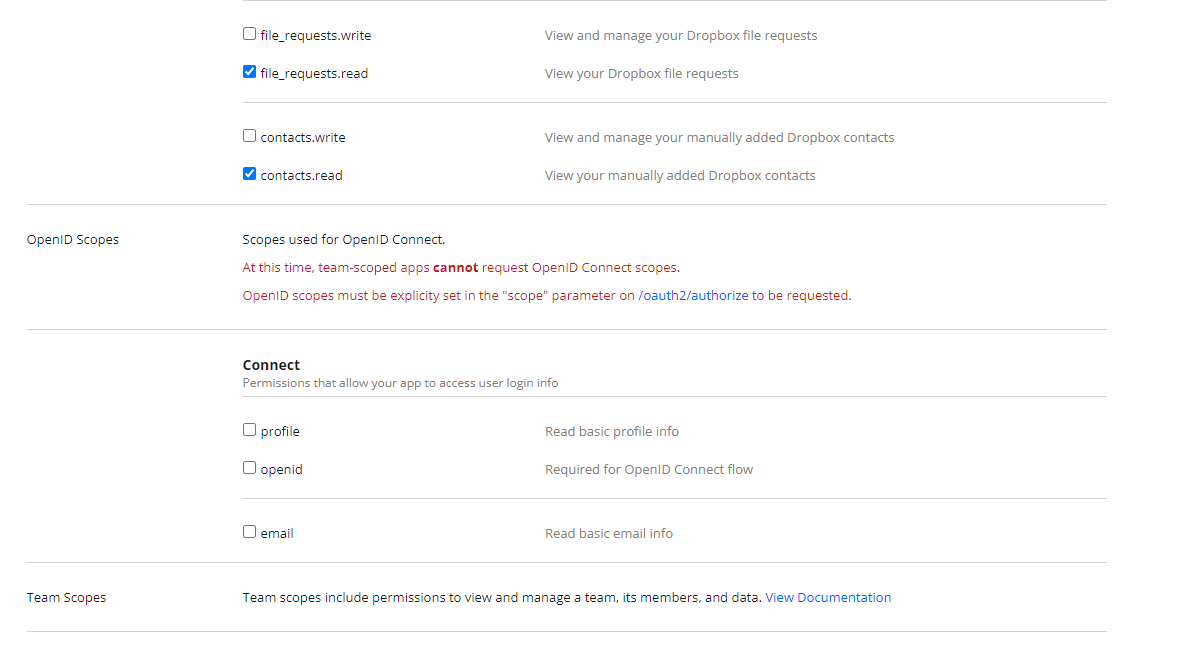
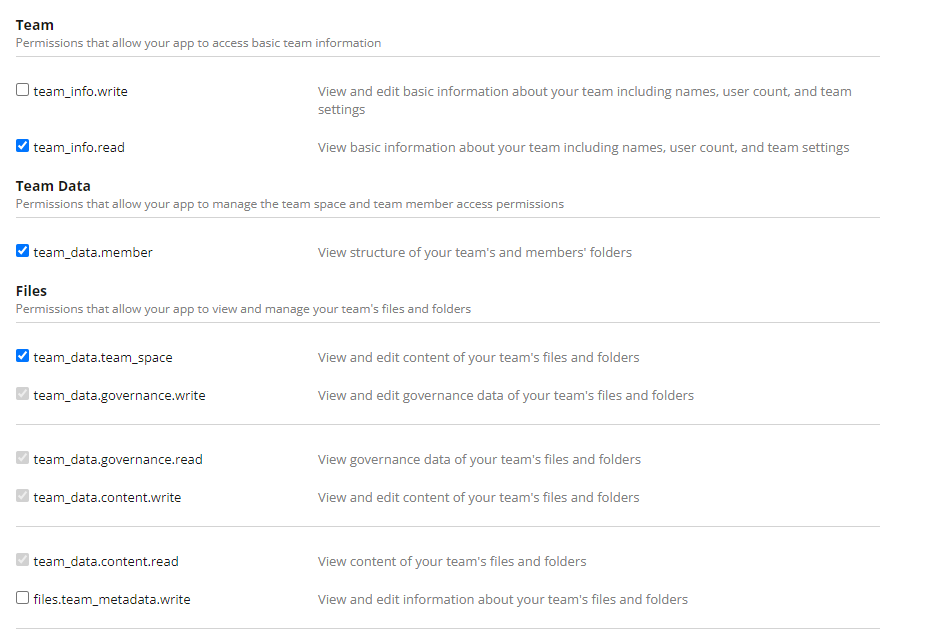
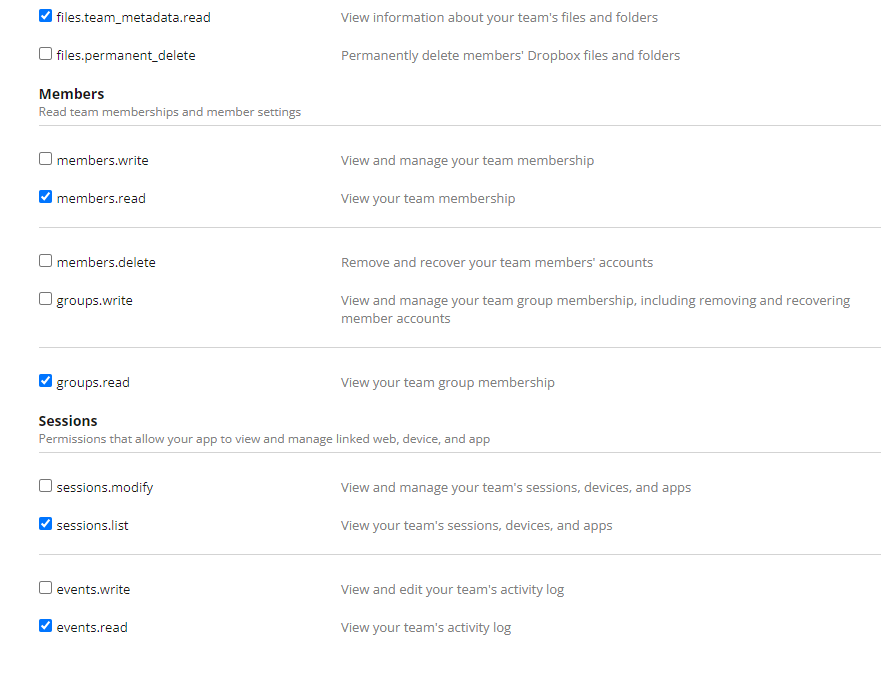
Required Permissions
When setting up your Dropbox app, ensure you configure the following permissions:
Cloudiway Connector Setup
After obtaining your credentials (automatic or manual), complete the setup in Cloudiway:
- 1 Navigate to Connectors
In Cloudiway portal, go to Configuration → Connectors
- 2 Create Dropbox Connector
Click "New Connector" and select "Dropbox"
- 3 Enter Credentials (Manual Mode)
If using manual setup, switch to manual mode and enter:
- • App Key: Your Client ID
- • Refresh Token: The token from Stage 2
- 4 Test Connection
Click "Test" to verify the connector is working correctly.
Screenshots