How Do I Pay an Invoice?
Complete your Cloudiway invoice payment quickly and securely.
Overview
The Cloudiway Migration Platform provides a streamlined invoice payment system. Once the Cloudiway sales team has prepared your invoice, you can complete payment directly through your account dashboard.
Payment Flow
Payment Steps
Access Your Account
Log into your account at portal.cloudiway.com
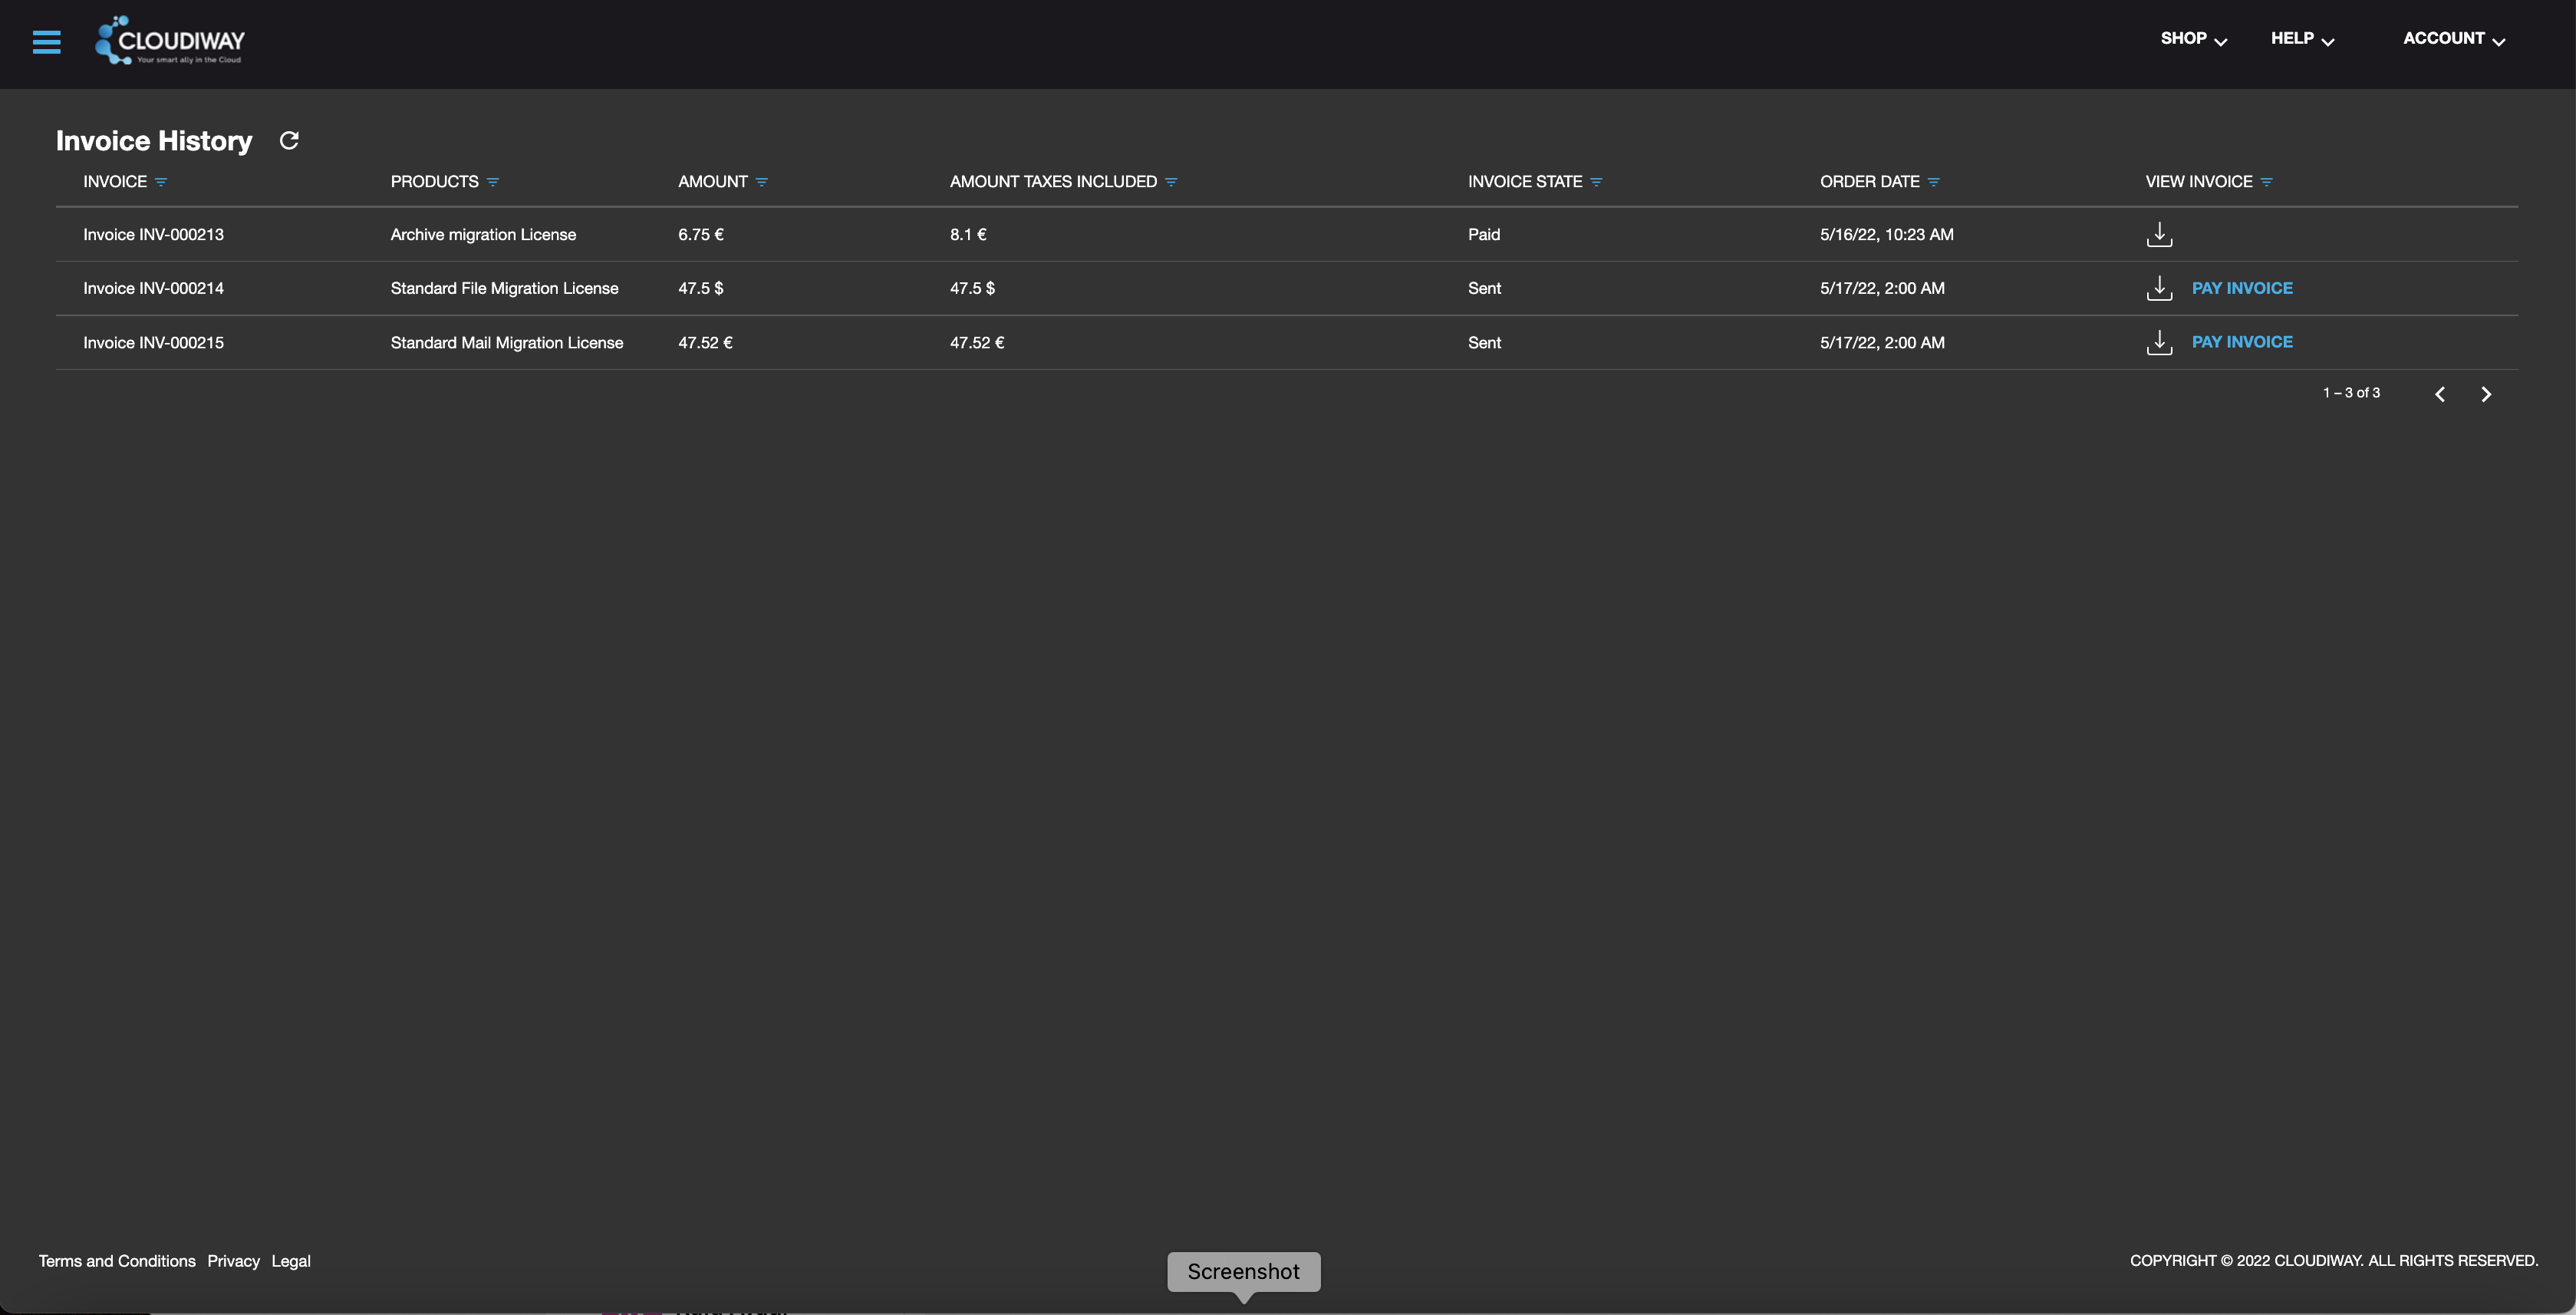
Locate Your Invoice
From the dashboard, select the SHOP dropdown menu and click Invoice History.
Initiate Payment
Find your invoice and click the Pay Invoice button next to it.
Review Billing Information
Verify your billing details on the billing screen, then click Next.
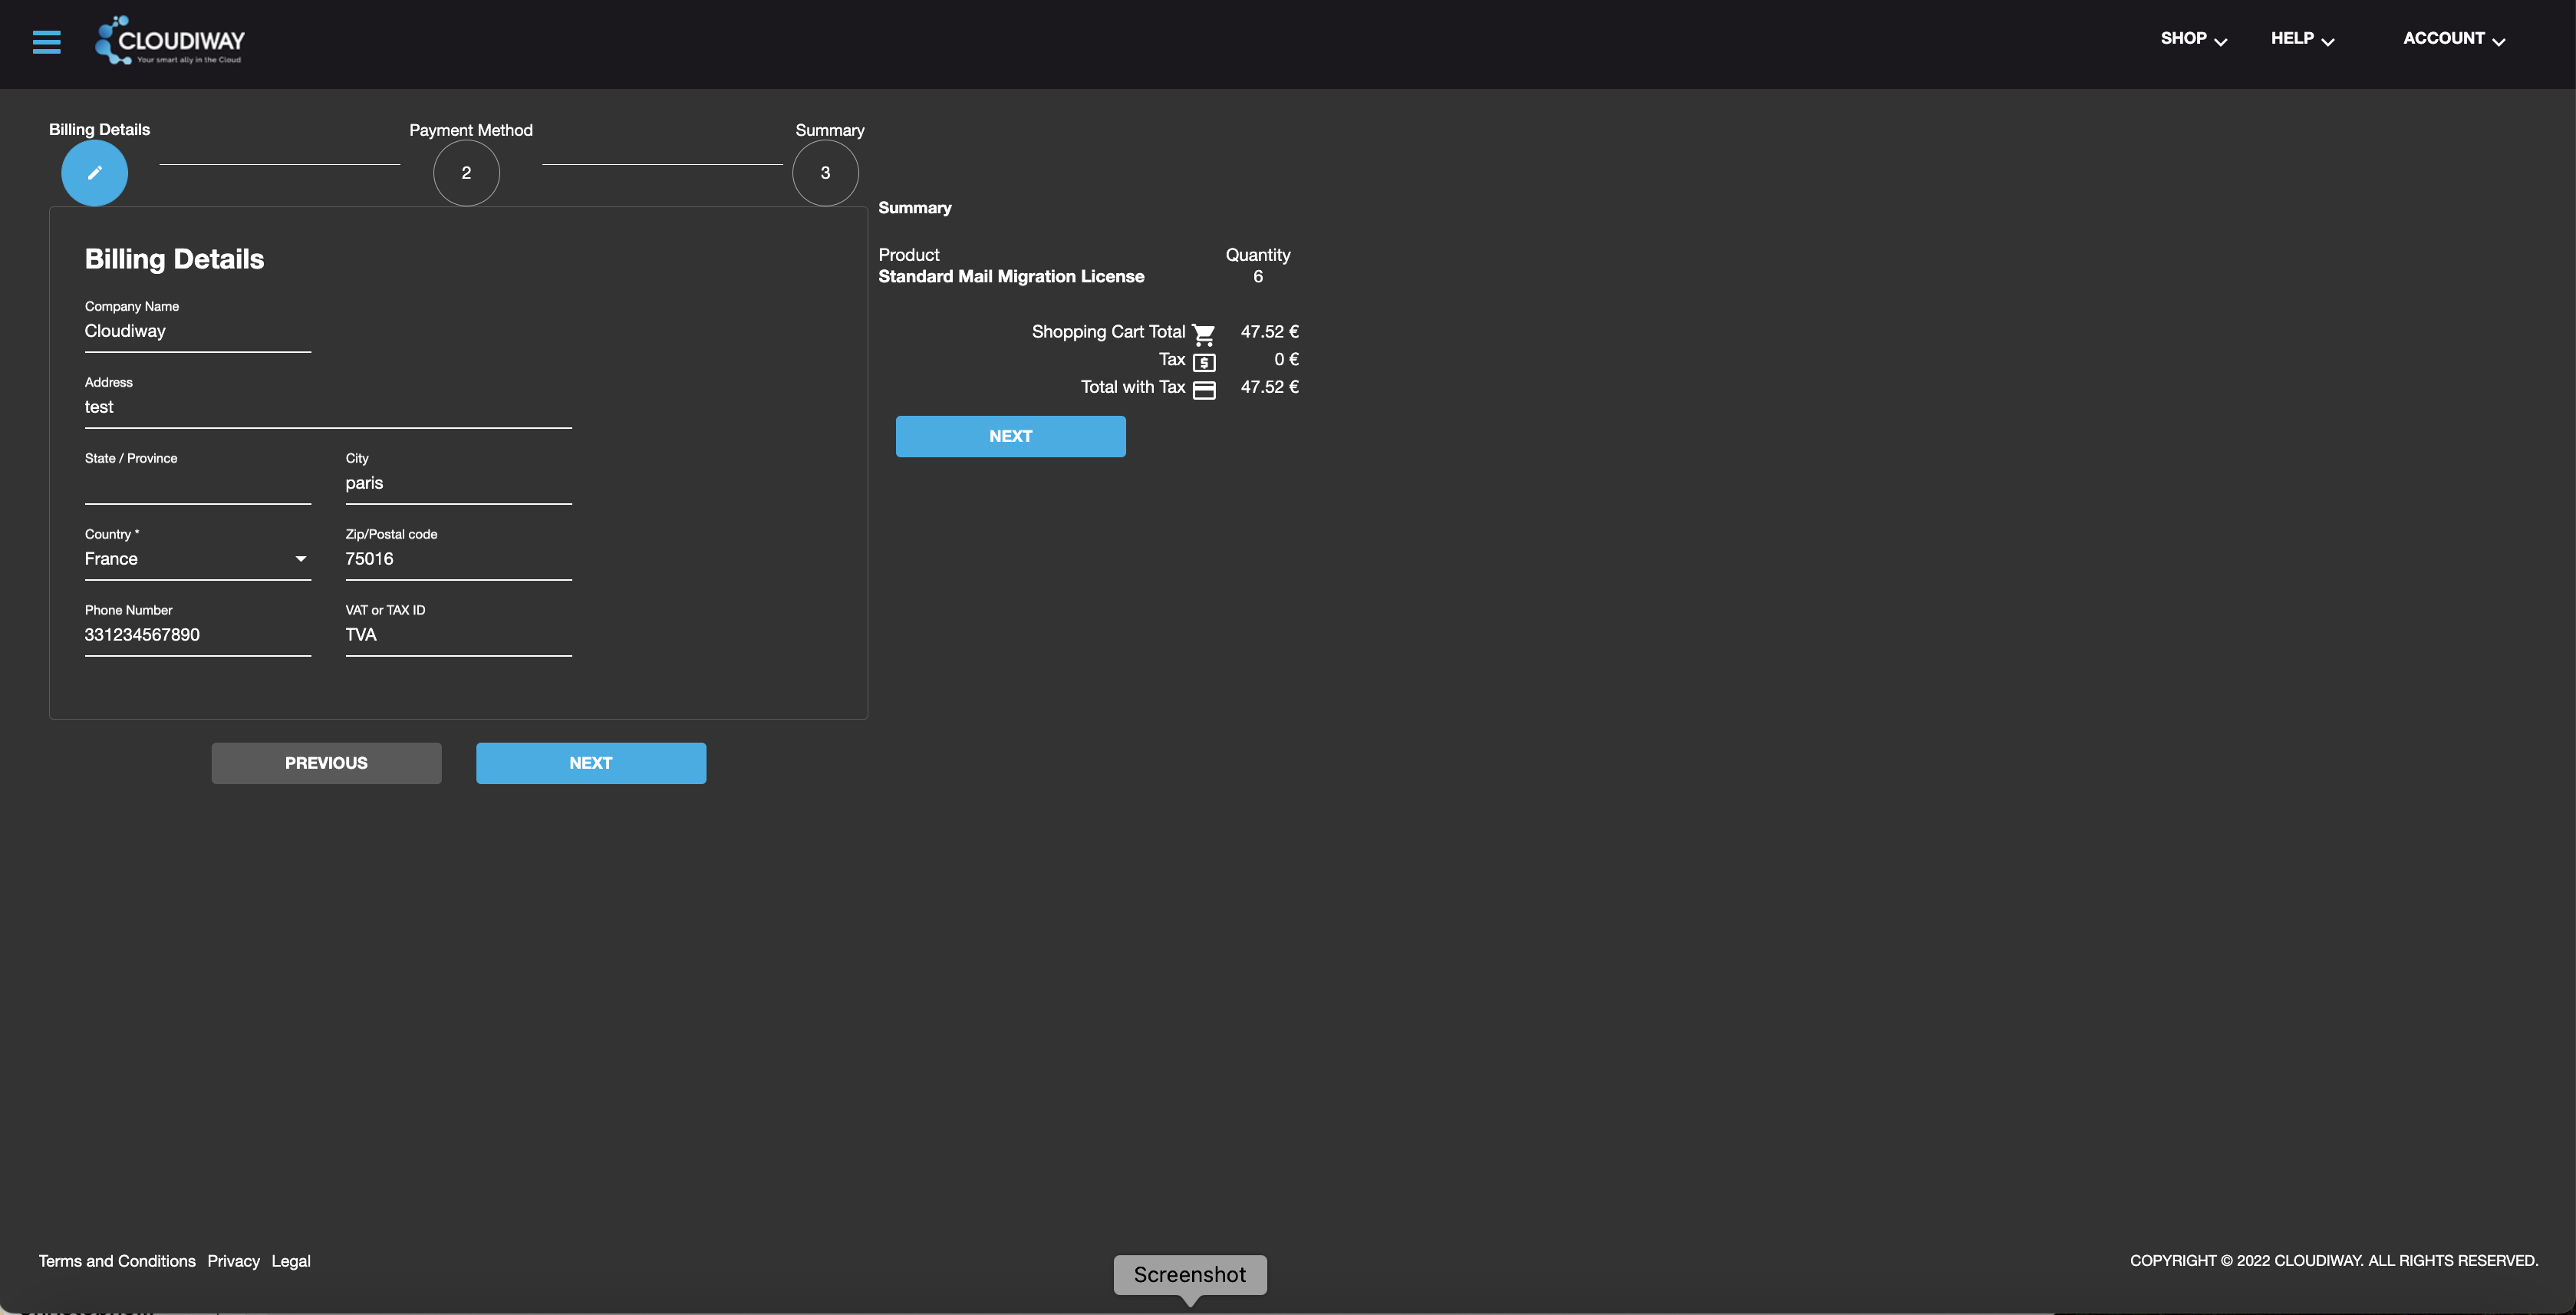
Select Payment Method
Choose your preferred payment method by clicking its icon, then select Next.
Complete Checkout
Press Checkout, enter your payment details, and click Pay.
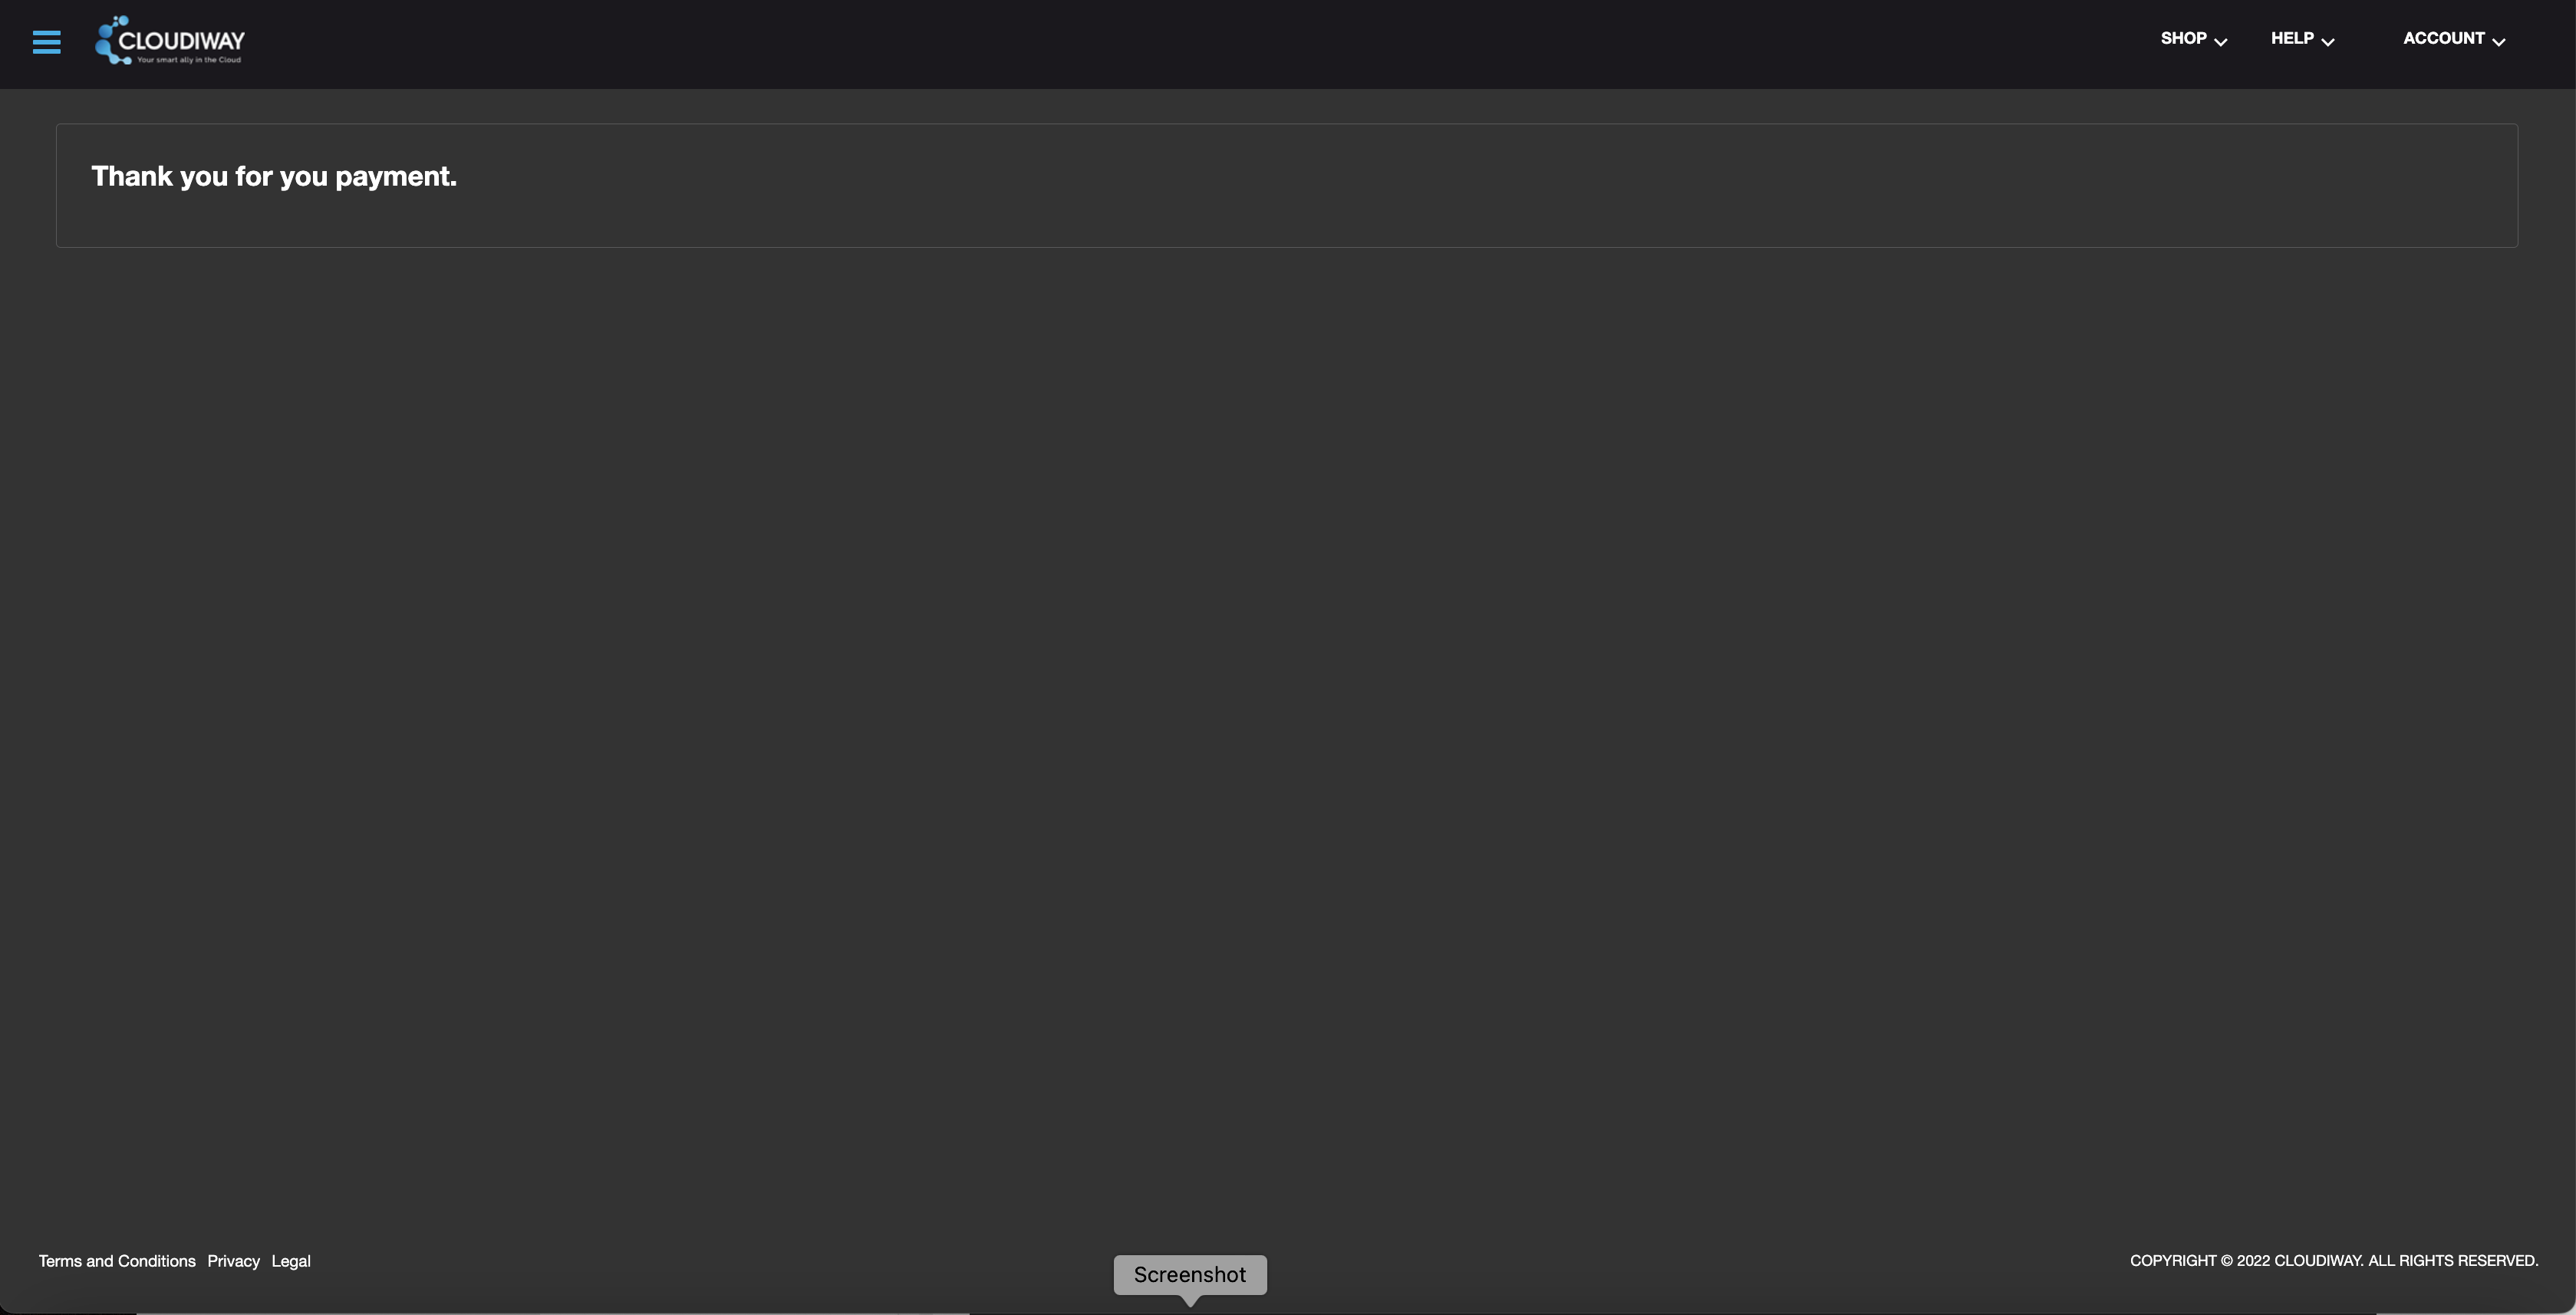
Payment Confirmation
Upon successful payment processing, you'll receive a "Thank You for your payment" confirmation prompt on your account dashboard.
What Happens Next
- • Your invoice status will update to "Paid"
- • Licenses will be activated in your account
- • A receipt will be sent to your registered email