Vault Connector Configuration
Set up a Vault Connector to migrate Google Groups, Google Mail Vault, and Google File Vault data to your target platform.
Overview
The Vault Connector enables migration of archived data from Google Vault to Microsoft 365 or other target platforms. This connector supports:
Google Groups
Group messages and membership
Mail Vault
Archived email data
File Vault
Archived files and documents
Create Connector
Step 1: Navigate to Connectors
- 1 Log into the Cloudiway portal
- 2 Navigate to Connectors in the left menu
- 3 Click NEW to create a new connector
- 4 Select Vault as the connector type
Configuration Options
Step 2: Basic Configuration
Connector Name
Enter a descriptive name for your connector (e.g., "Google Vault - Production")
Product Selection
Choose the product based on your migration type:
For Google Groups and Mail Vault migrations
For Google File Vault migrations
Required Fields
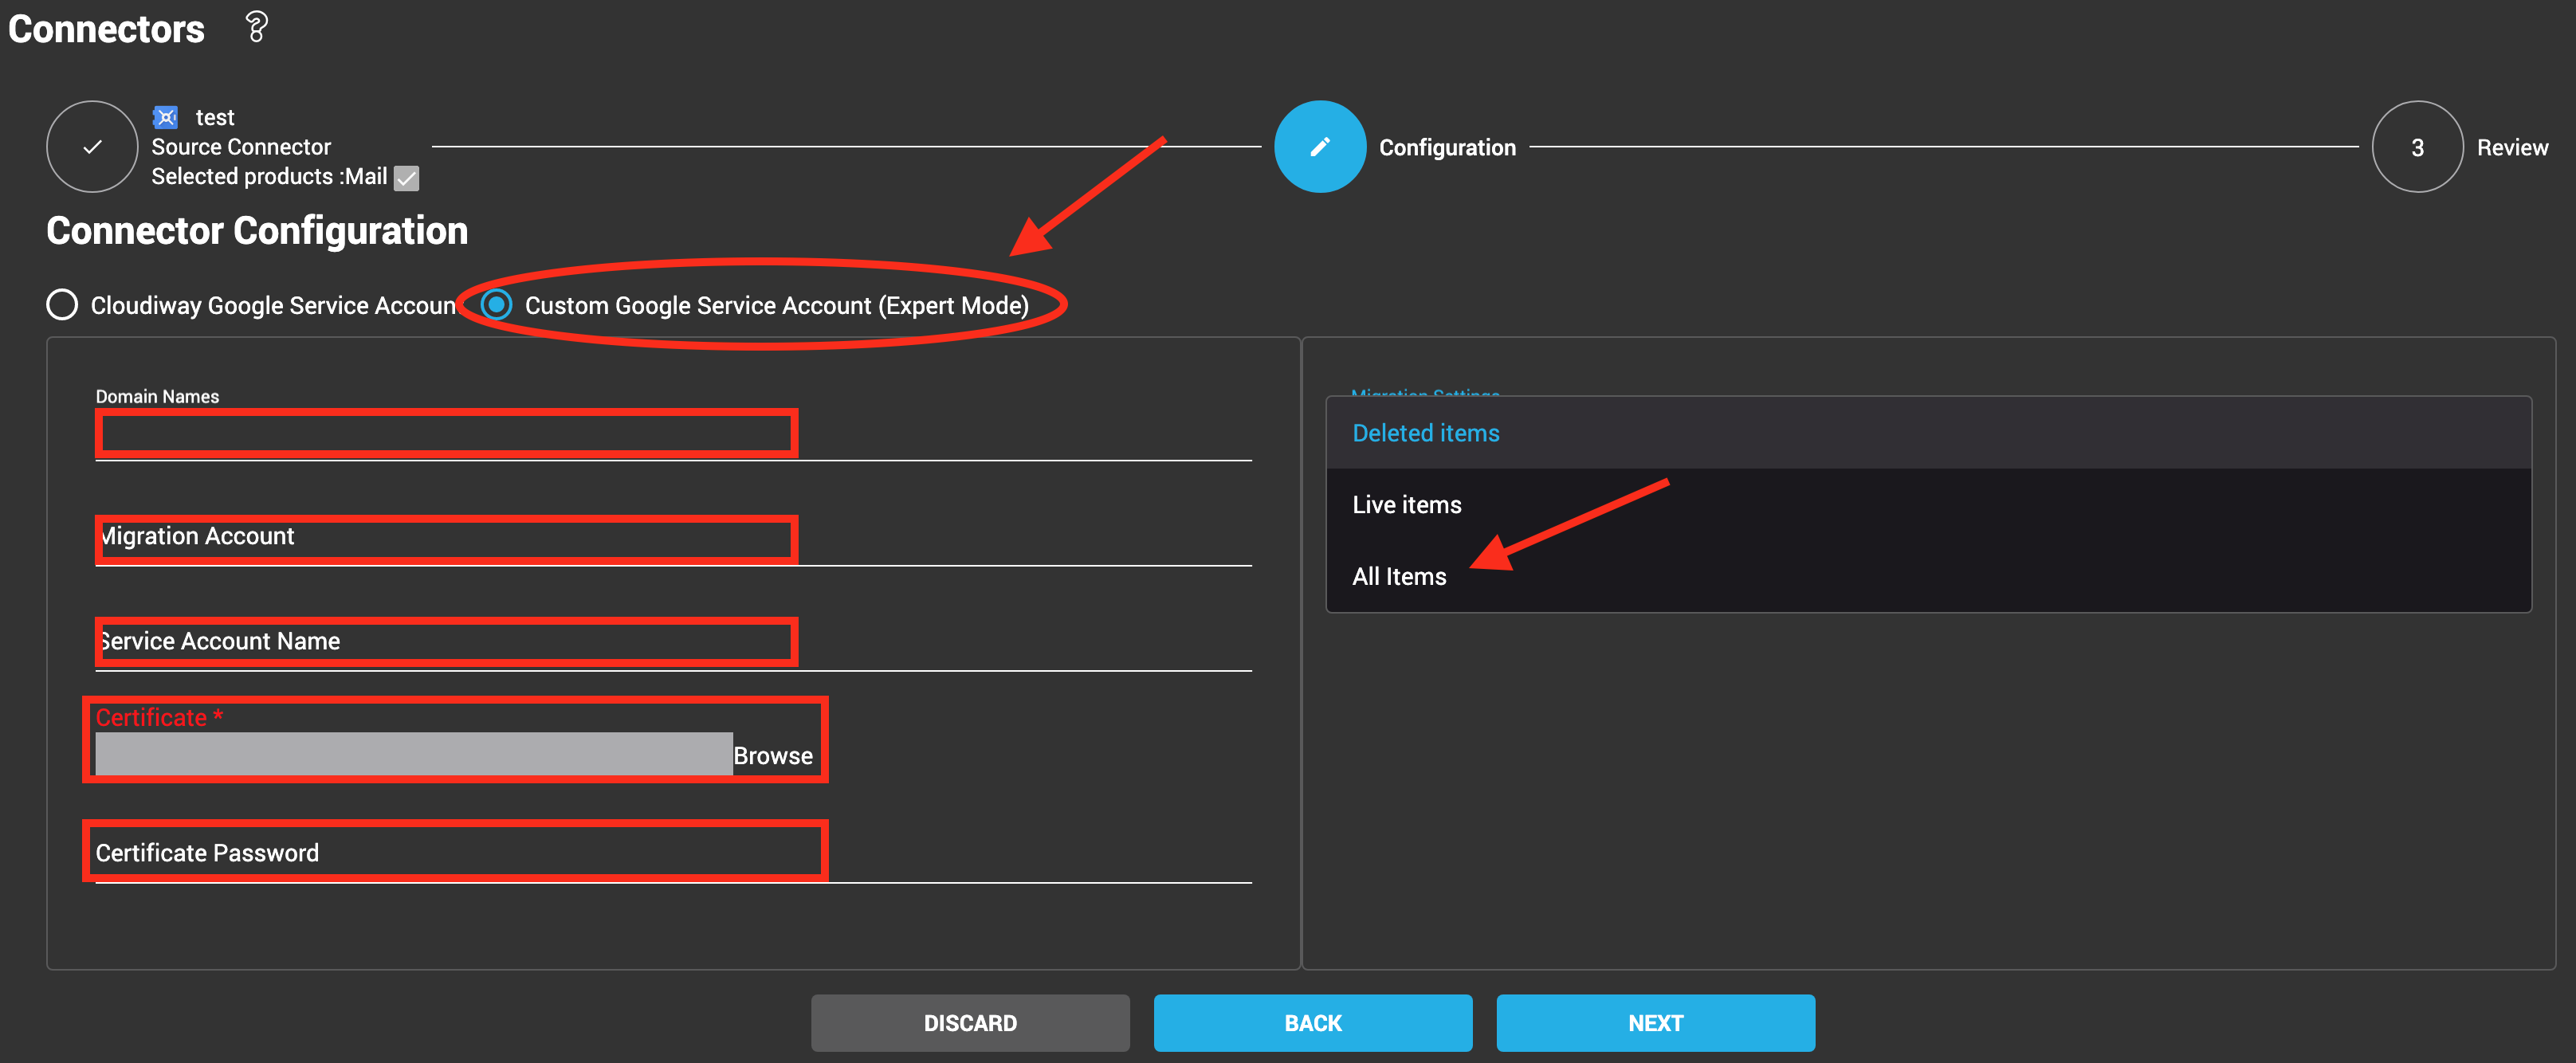
Domain Names
Enter the domain names to manage. You can add multiple domains.
Migration Account
Provide the email address of the account to impersonate (typically a super admin account).
Phone Number & Login Location
Required for Site/Groups migrations. Enter the phone number and typical login location.
Admin Account Recommendation
For best results, the migration account should be a super admin of the Google Workspace tenant. However, you can also assign specific admin/owner/manager rights per resource instead of using super admin credentials.
Service Account Setup
Choose one of two approaches for service account configuration:
Option 1: Cloudiway Service Account
Use Cloudiway's pre-configured Google Service Account.
- • Fastest setup
- • No certificate management
- • Recommended for most users
Option 2: Custom Service Account
Define your own Google Service Account.
- • Full control over credentials
- • Required for some compliance scenarios
- • Requires certificate management
Custom Service Account Fields
If using a custom service account, provide the following:
- Service Account Name
The email address of your service account
- Certificate File
Import the P12 certificate file from Google Cloud Console
- Certificate Password
The password for the certificate file
Complete Setup
Finalize Configuration
- 1 Review all entered settings
- 2 Click NEXT to proceed
- 3 Click COMPLETE to finalize the connector
- 4 Test the connection to verify configuration
Next Steps
- Configure target connector (Office 365 or Google Workspace)
- Upload user mapping file
- Start migration tasks
Screenshots