Overview
A Google Cloud service account is required to connect Cloudiway to your Google Workspace environment. This service account enables secure API access for migrating email, files, calendars, and other data from Google Workspace to Microsoft 365 or other platforms.
What You'll Create
- A Google Cloud project to host the service account
- API access for Gmail, Drive, Calendar, and other services
- A service account with domain-wide delegation
- P12 key file for authentication
Prerequisites
Before you begin, ensure you have:
- Google Super Administrator access to your Google Workspace domain
- Access to the Google Cloud Console
- Access to the Google Admin Console
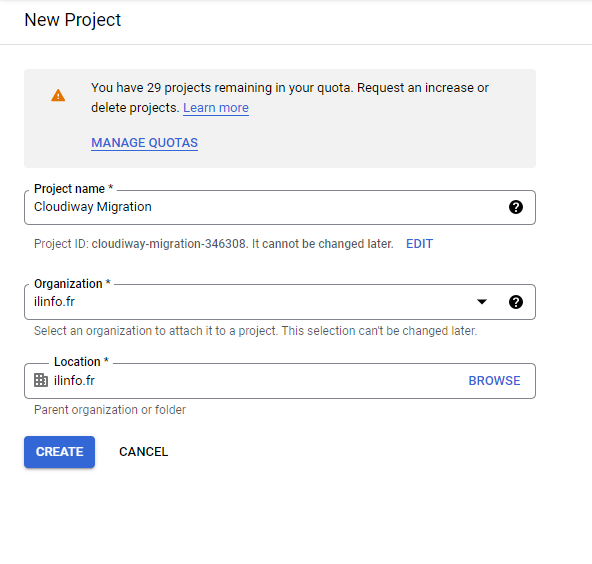
Step 1: Create a Google Cloud Project
- Sign in to the Google Cloud Console as a Super Administrator
- Click the project dropdown at the top of the page
- Click New Project
- Enter a project name (e.g., "Cloudiway Migration")
- Select your organization from the dropdown (if applicable)
- Click Create
- Wait for the project to be created, then select it from the project dropdown
Project Naming
Use a descriptive name that identifies the project's purpose, such as "Cloudiway-Migration-2024" or "Company-Name-Migration".
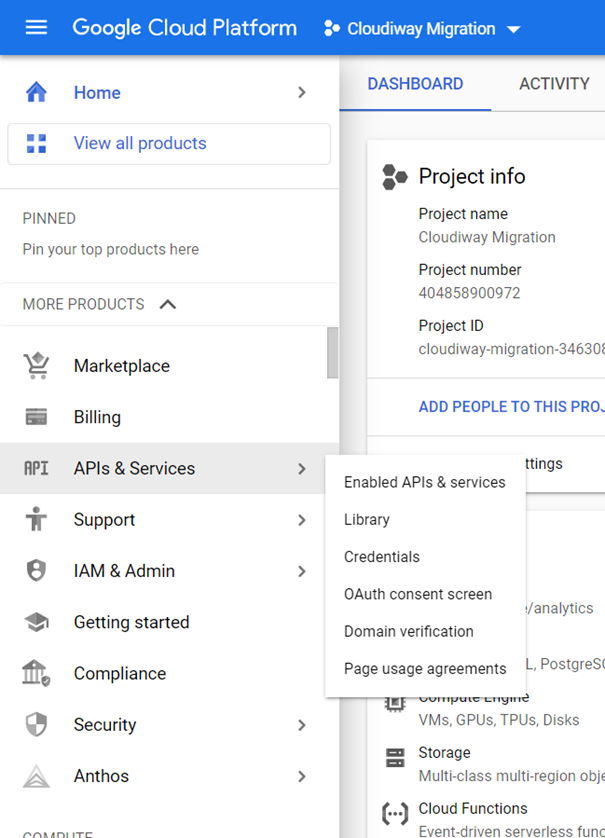
Step 2: Enable Required APIs
Enable the following APIs in your Google Cloud project. Each API provides access to different types of data during migration.
- In the Google Cloud Console, navigate to APIs & Services → Library
- Search for and enable each of the following APIs:
Email & Communication
- Gmail API
- Google Calendar API
- Google Chat API
- CalDAV API
Files & Storage
- Google Drive API
- Google Vault API
Contacts & People
- Contacts API
- Google People API
Administration
- Admin SDK API
- Google Tasks API
API Enablement
For each API, click the search result, then click Enable. Wait for confirmation before proceeding to the next API.
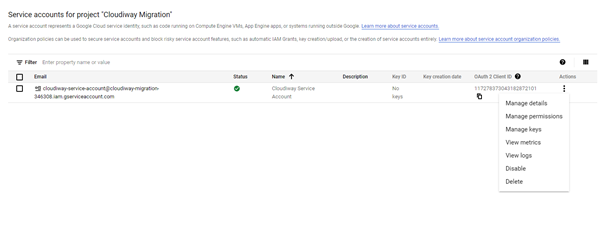
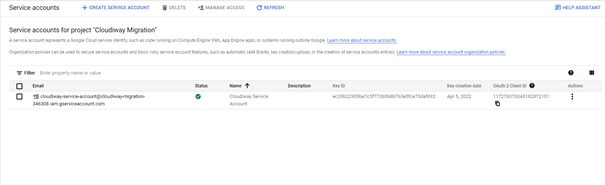
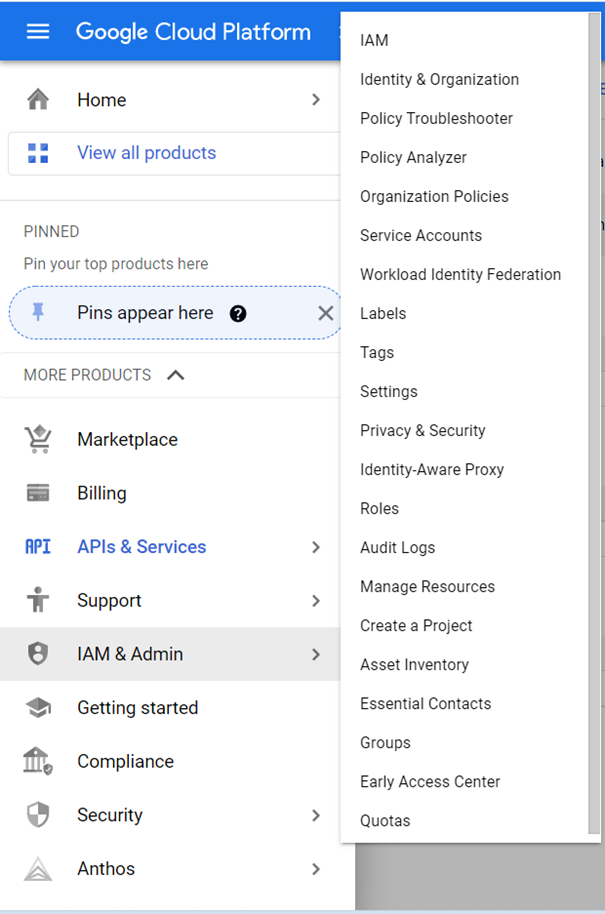
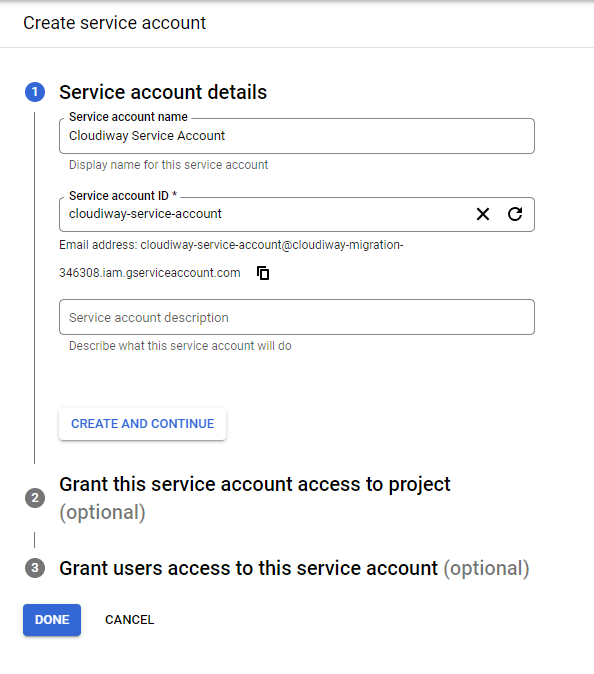
Step 3: Create the Service Account
- Navigate to IAM & Admin → Service Accounts
- Click Create Service Account
- Enter a service account name (e.g., "cloudiway-migration")
- Note the automatically generated email address (you'll need this later)
- Click Create and Continue
- Skip the optional permissions step by clicking Continue
- Click Done
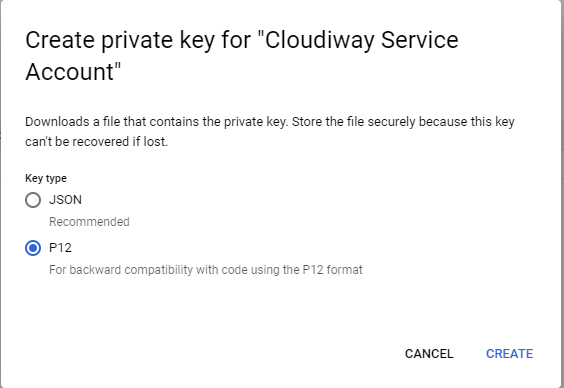
Generate the P12 Key
- Click on the service account you just created
- Navigate to the Keys tab
- Click Add Key → Create new key
- Select P12 format
- Click Create
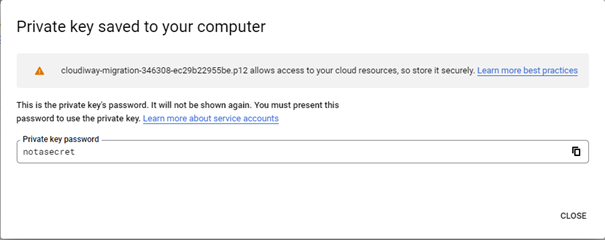
- The P12 file downloads automatically—save it securely


Important: Save These Values
- Service Account Email: e.g., cloudiway-migration@project-id.iam.gserviceaccount.com
- OAuth 2.0 Client ID: Found in the service account details (a long numeric string)
- P12 Key File: The downloaded file (default password: "notasecret")
Step 4: Configure Domain-Wide Delegation
Domain-wide delegation allows the service account to impersonate users in your organization for data access.
Enable Delegation on Service Account
- In the Google Cloud Console, go to IAM & Admin → Service Accounts
- Click on your service account
- Click Show domain-wide delegation
- Check the box for Enable Google Workspace Domain-wide Delegation
- Click Save
Authorize in Google Admin Console
- Sign in to the Google Admin Console
- Navigate to Security → Access and data control → API controls
- Click Manage Domain Wide Delegation
- Click Add new
- Enter the OAuth 2.0 Client ID from your service account
- Add the following OAuth scopes (comma-separated):
https://mail.google.com/,https://www.googleapis.com/auth/calendar,https://www.googleapis.com/auth/contacts,https://www.googleapis.com/auth/drive,https://www.googleapis.com/auth/admin.directory.user.readonly,https://www.googleapis.com/auth/admin.directory.group.readonly,https://www.googleapis.com/auth/gmail.settings.sharing,https://www.googleapis.com/auth/chat.spaces.readonly,https://www.googleapis.com/auth/chat.messages.readonly
- Click Authorize
Scope Verification
Ensure all required scopes are authorized. Missing scopes will cause API errors during migration.
Next Steps
With your service account created and configured, you're ready to set up your Cloudiway connector:
- Log in to the Cloudiway Portal
- Navigate to Connectors
- Create a new Google Workspace connector
- Enter your service account email
- Upload the P12 key file
- Enter the key password (default: "notasecret")
- Test the connection
Configuration Complete
Your Google service account is now ready for use with Cloudiway. Proceed to configure your Google Workspace connector in the Cloudiway portal.