GALSync On-Premises Connector
Connect your on-premises Exchange directory to the Cloudiway coexistence platform.
GALSync On-Premises Architecture
Overview
The GALSync On-Premises solution uses a local agent to facilitate communication between your on-premises Exchange environment and the Cloudiway coexistence platform. Rather than the platform connecting directly to your infrastructure, the local agent periodically connects to the platform and checks if tasks need to be executed.
Key Benefits
- ✓ No inbound firewall rules required
- ✓ Agent initiates all connections outbound
- ✓ Secure communication with Cloudiway platform
How It Works
Two primary job types operate within this system:
📤 Pull Job
Extracts users and groups from your local Exchange Directory and uploads them to the Cloudiway platform.
📥 Push Job
Retrieves pending changes from the platform and applies them to your local Exchange Directory.
Setup Process
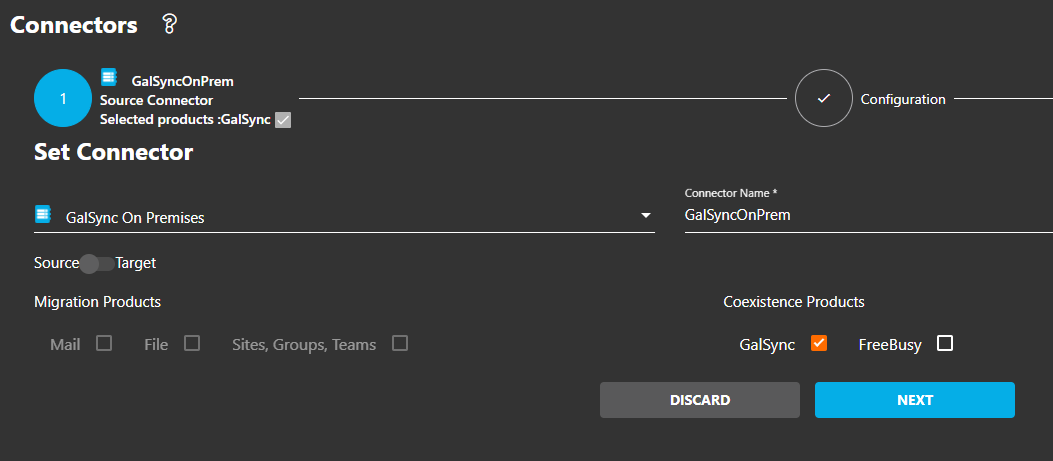
Step 1: Create the Connector
- Navigate to Connectors in the Cloudiway platform
- Click Add Connector and select GalSync OnPremises
- Enter an alias (appears between "https://" and "coex.cloudiway.com")
- Provide a descriptive name for the connector
- Click Create

Important
Step 2: Install the Local Agent
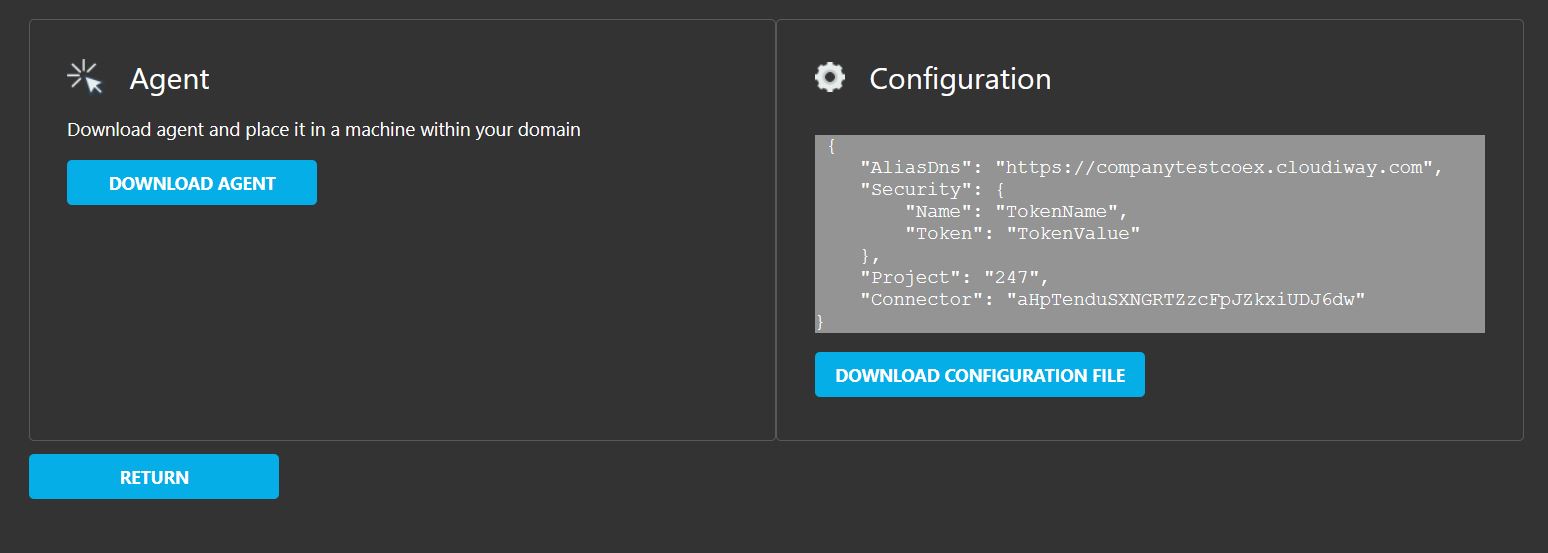
- After creating the connector, download the agent installer and configuration file
- Extract the downloaded files
- Run
CloudiwayLocalAgentInstaller.msi - Complete the installation wizard


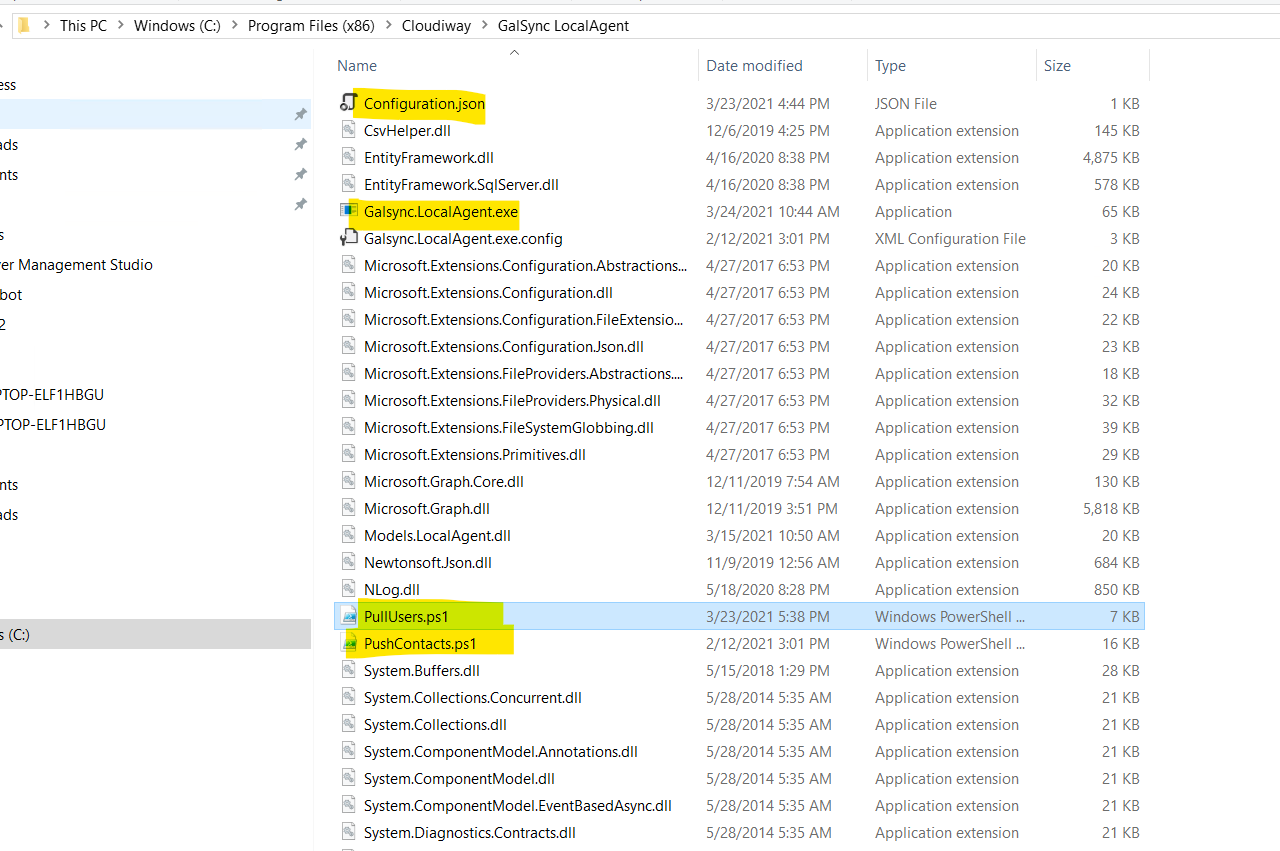
Installation Path
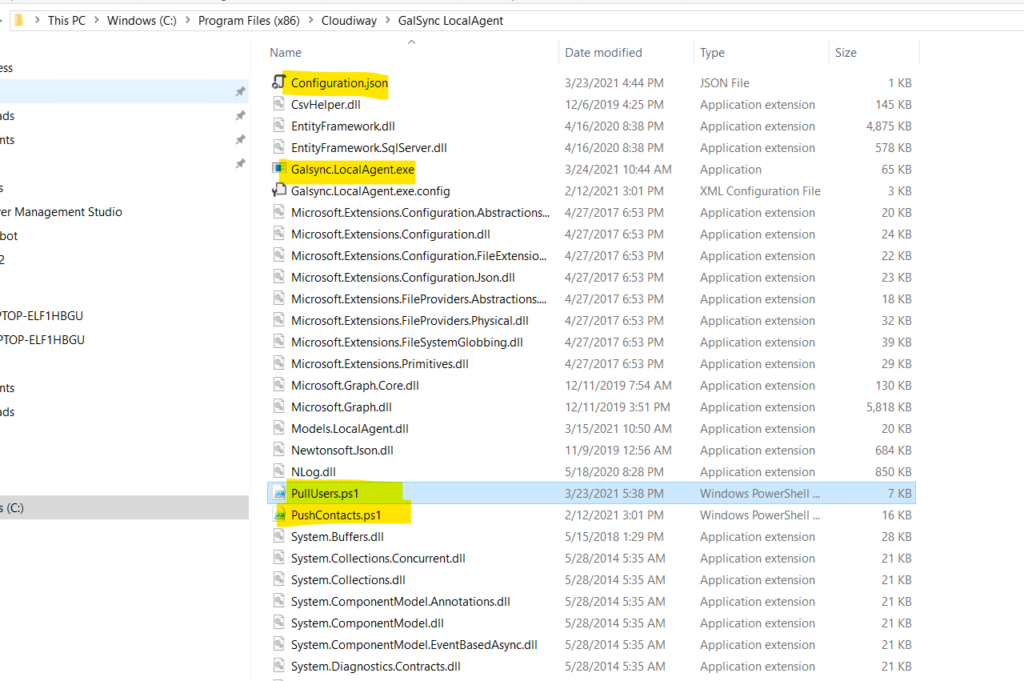
C:\Program Files (x86)\Cloudiway\GalSync LocalAgent Step 3: Configure the Agent
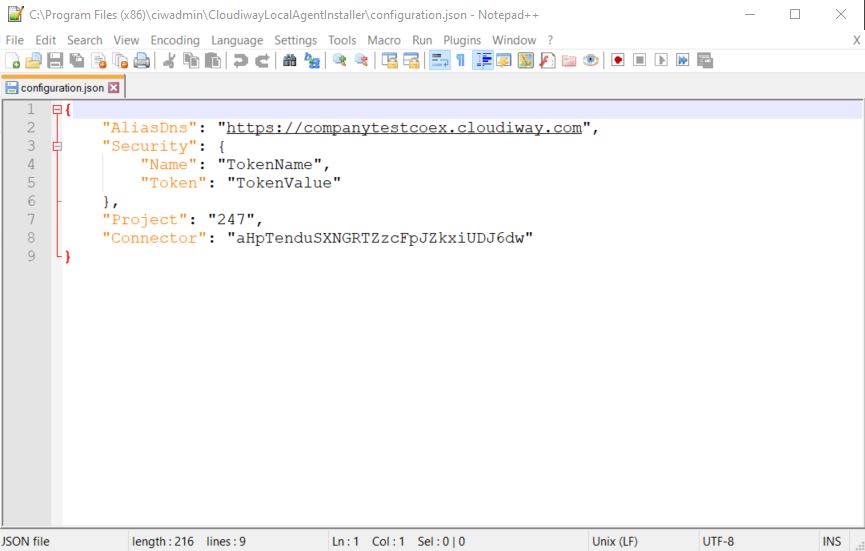
Copy your downloaded configuration.json
file into the installation directory.
Configuration Requirements
Configuration Settings
AliasDns
Must match exactly the alias you entered during connector creation.
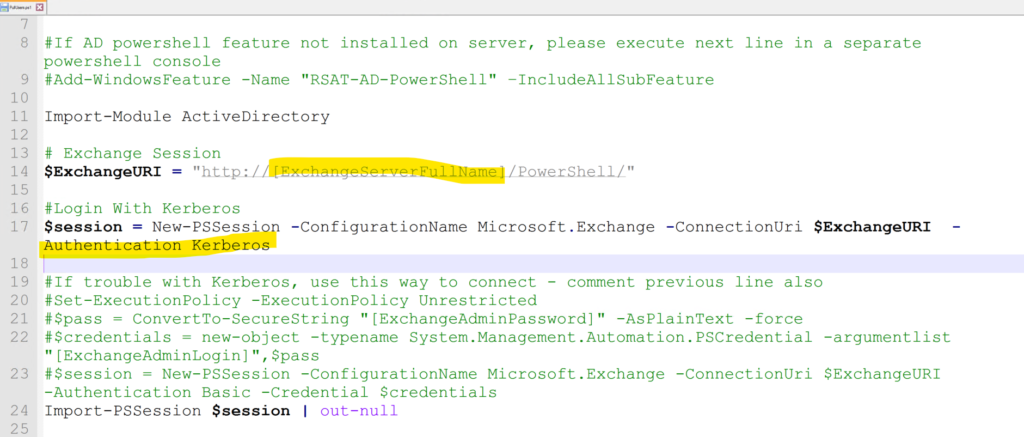
Exchange URI
Replace placeholder text with your Exchange server domain in both scripts:
- •
PullUsers.ps1 - •
PushContacts.ps1
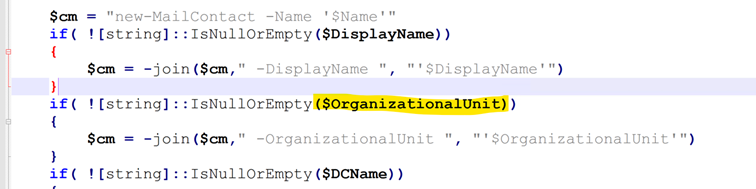
Organizational Unit (Optional)
Specify where contacts are created using the Distinguished Name format.
OU=Contacts,DC=company,DC=com Security Token
Generate a personal access token in the Cloudiway platform for authentication.
PowerShell Requirements
The local agent operates as a command-line application requiring PowerShell script execution with appropriate permissions for your Exchange environment. Ensure the execution policy allows script execution.
Screenshots