This article explains how to pay an invoice in the Cloudiway Migration Platform.
You should use this procedure in case if you need to pay an invoice already prepared by our sales team.
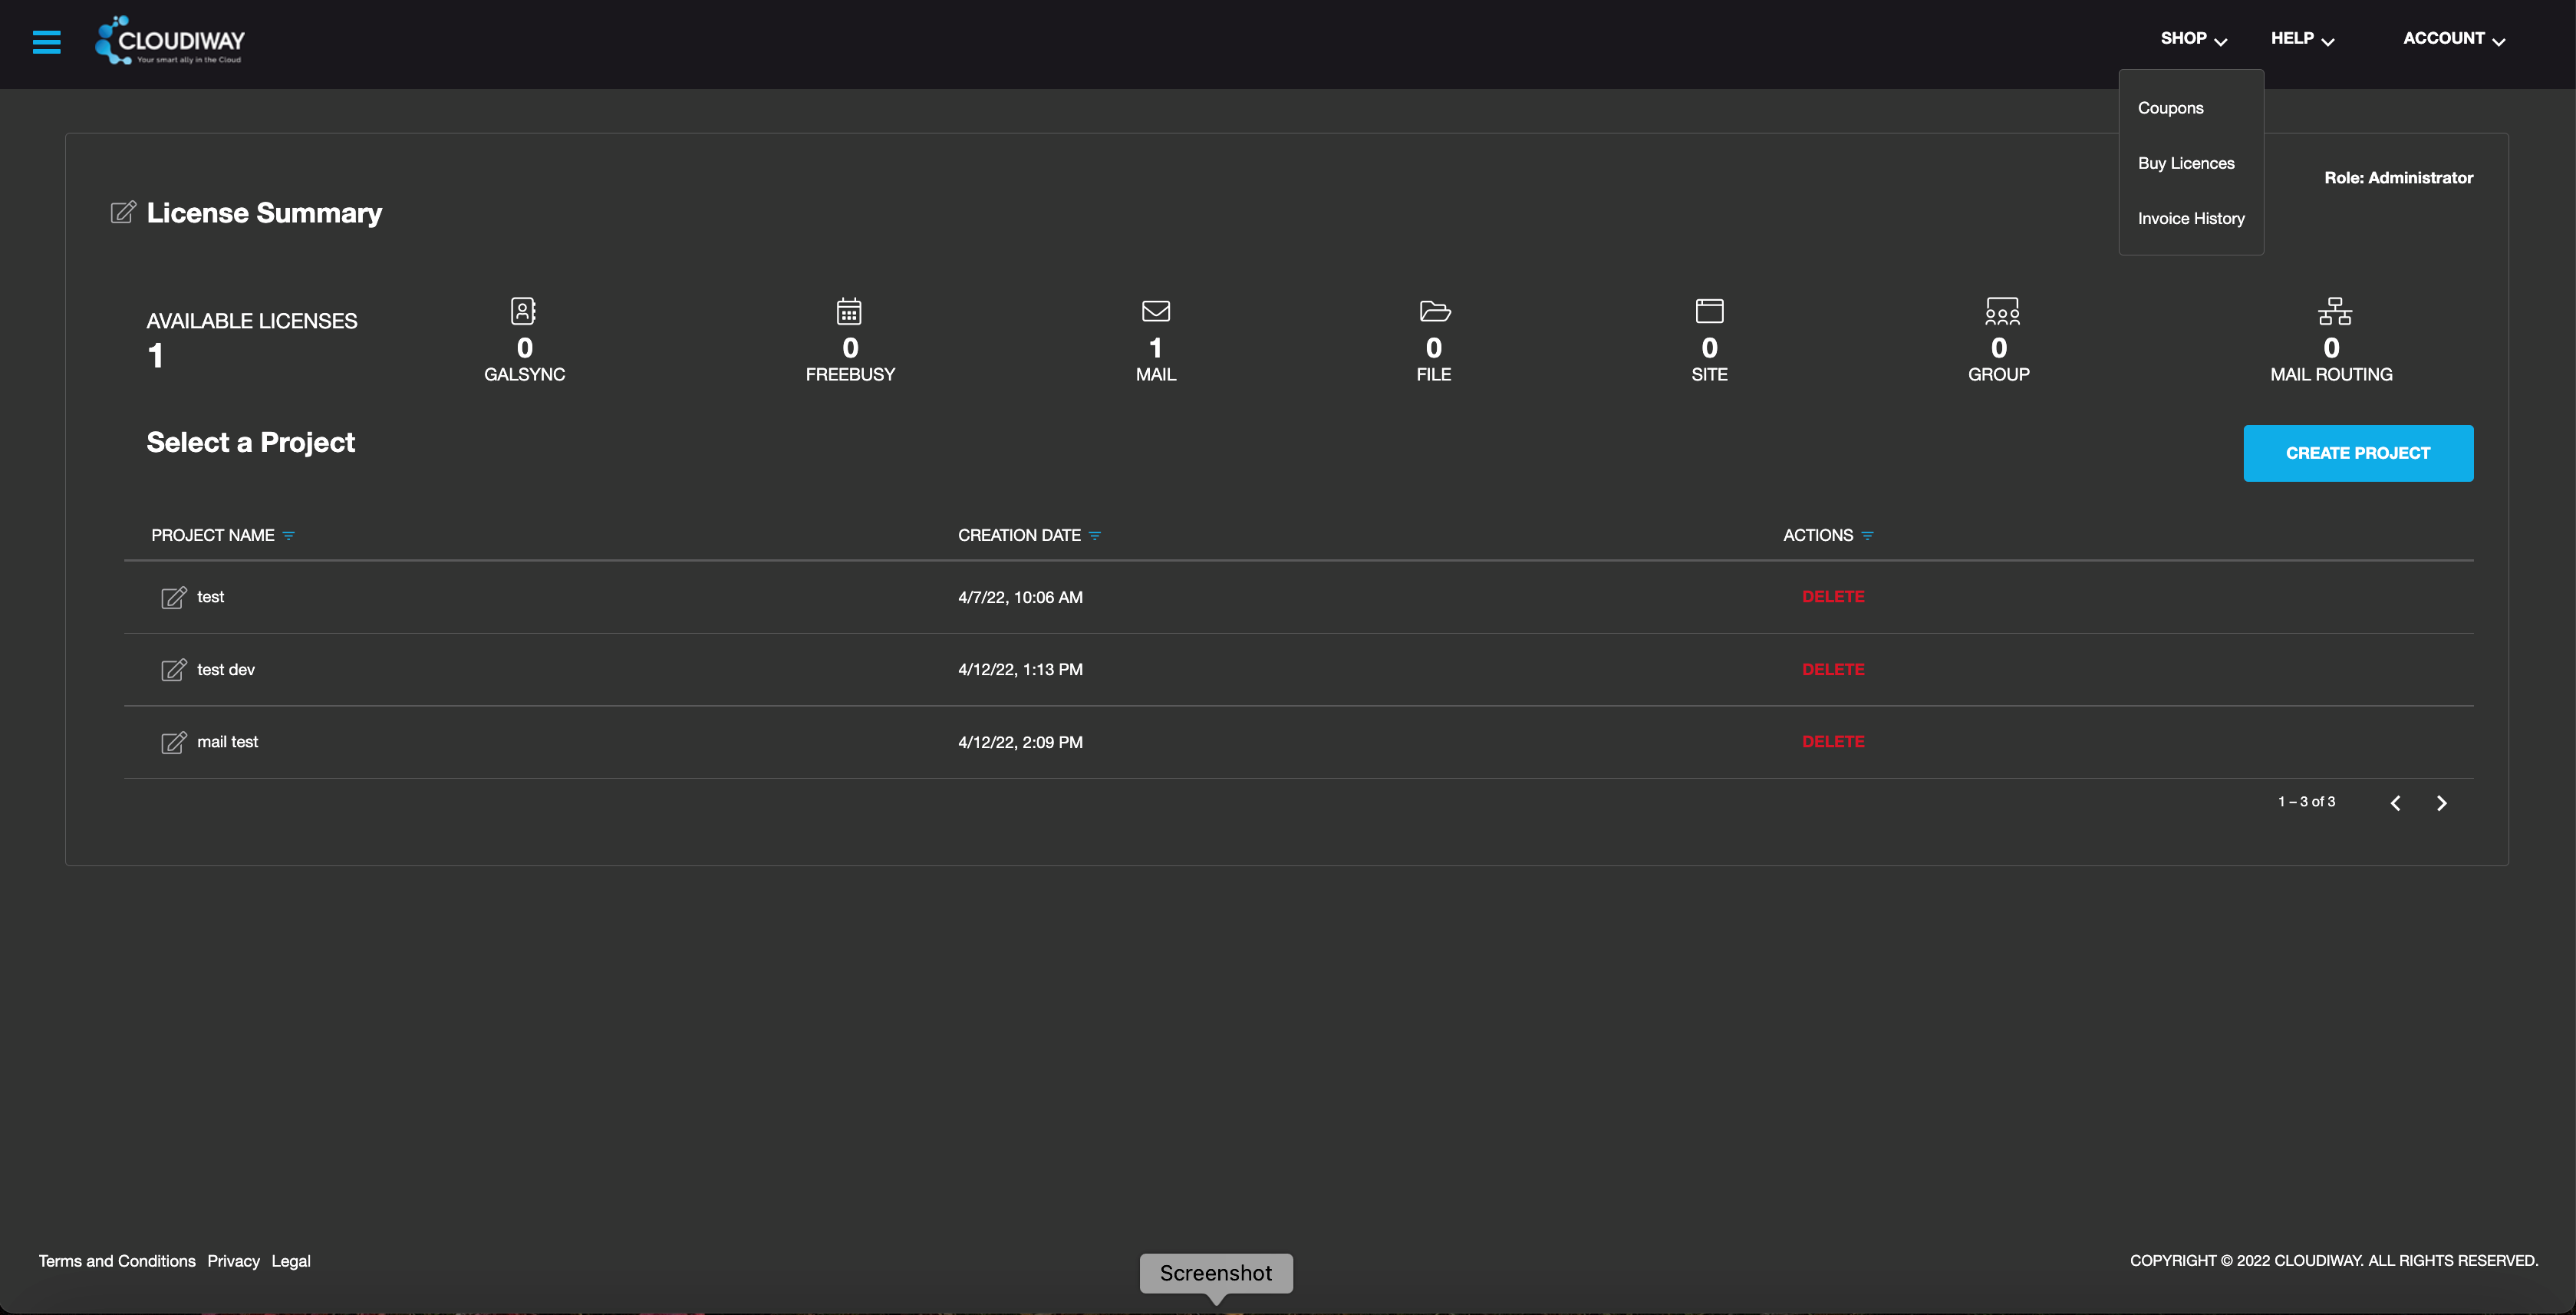
To pay your invoice, log into your account at https://portal.cloudiway.com/
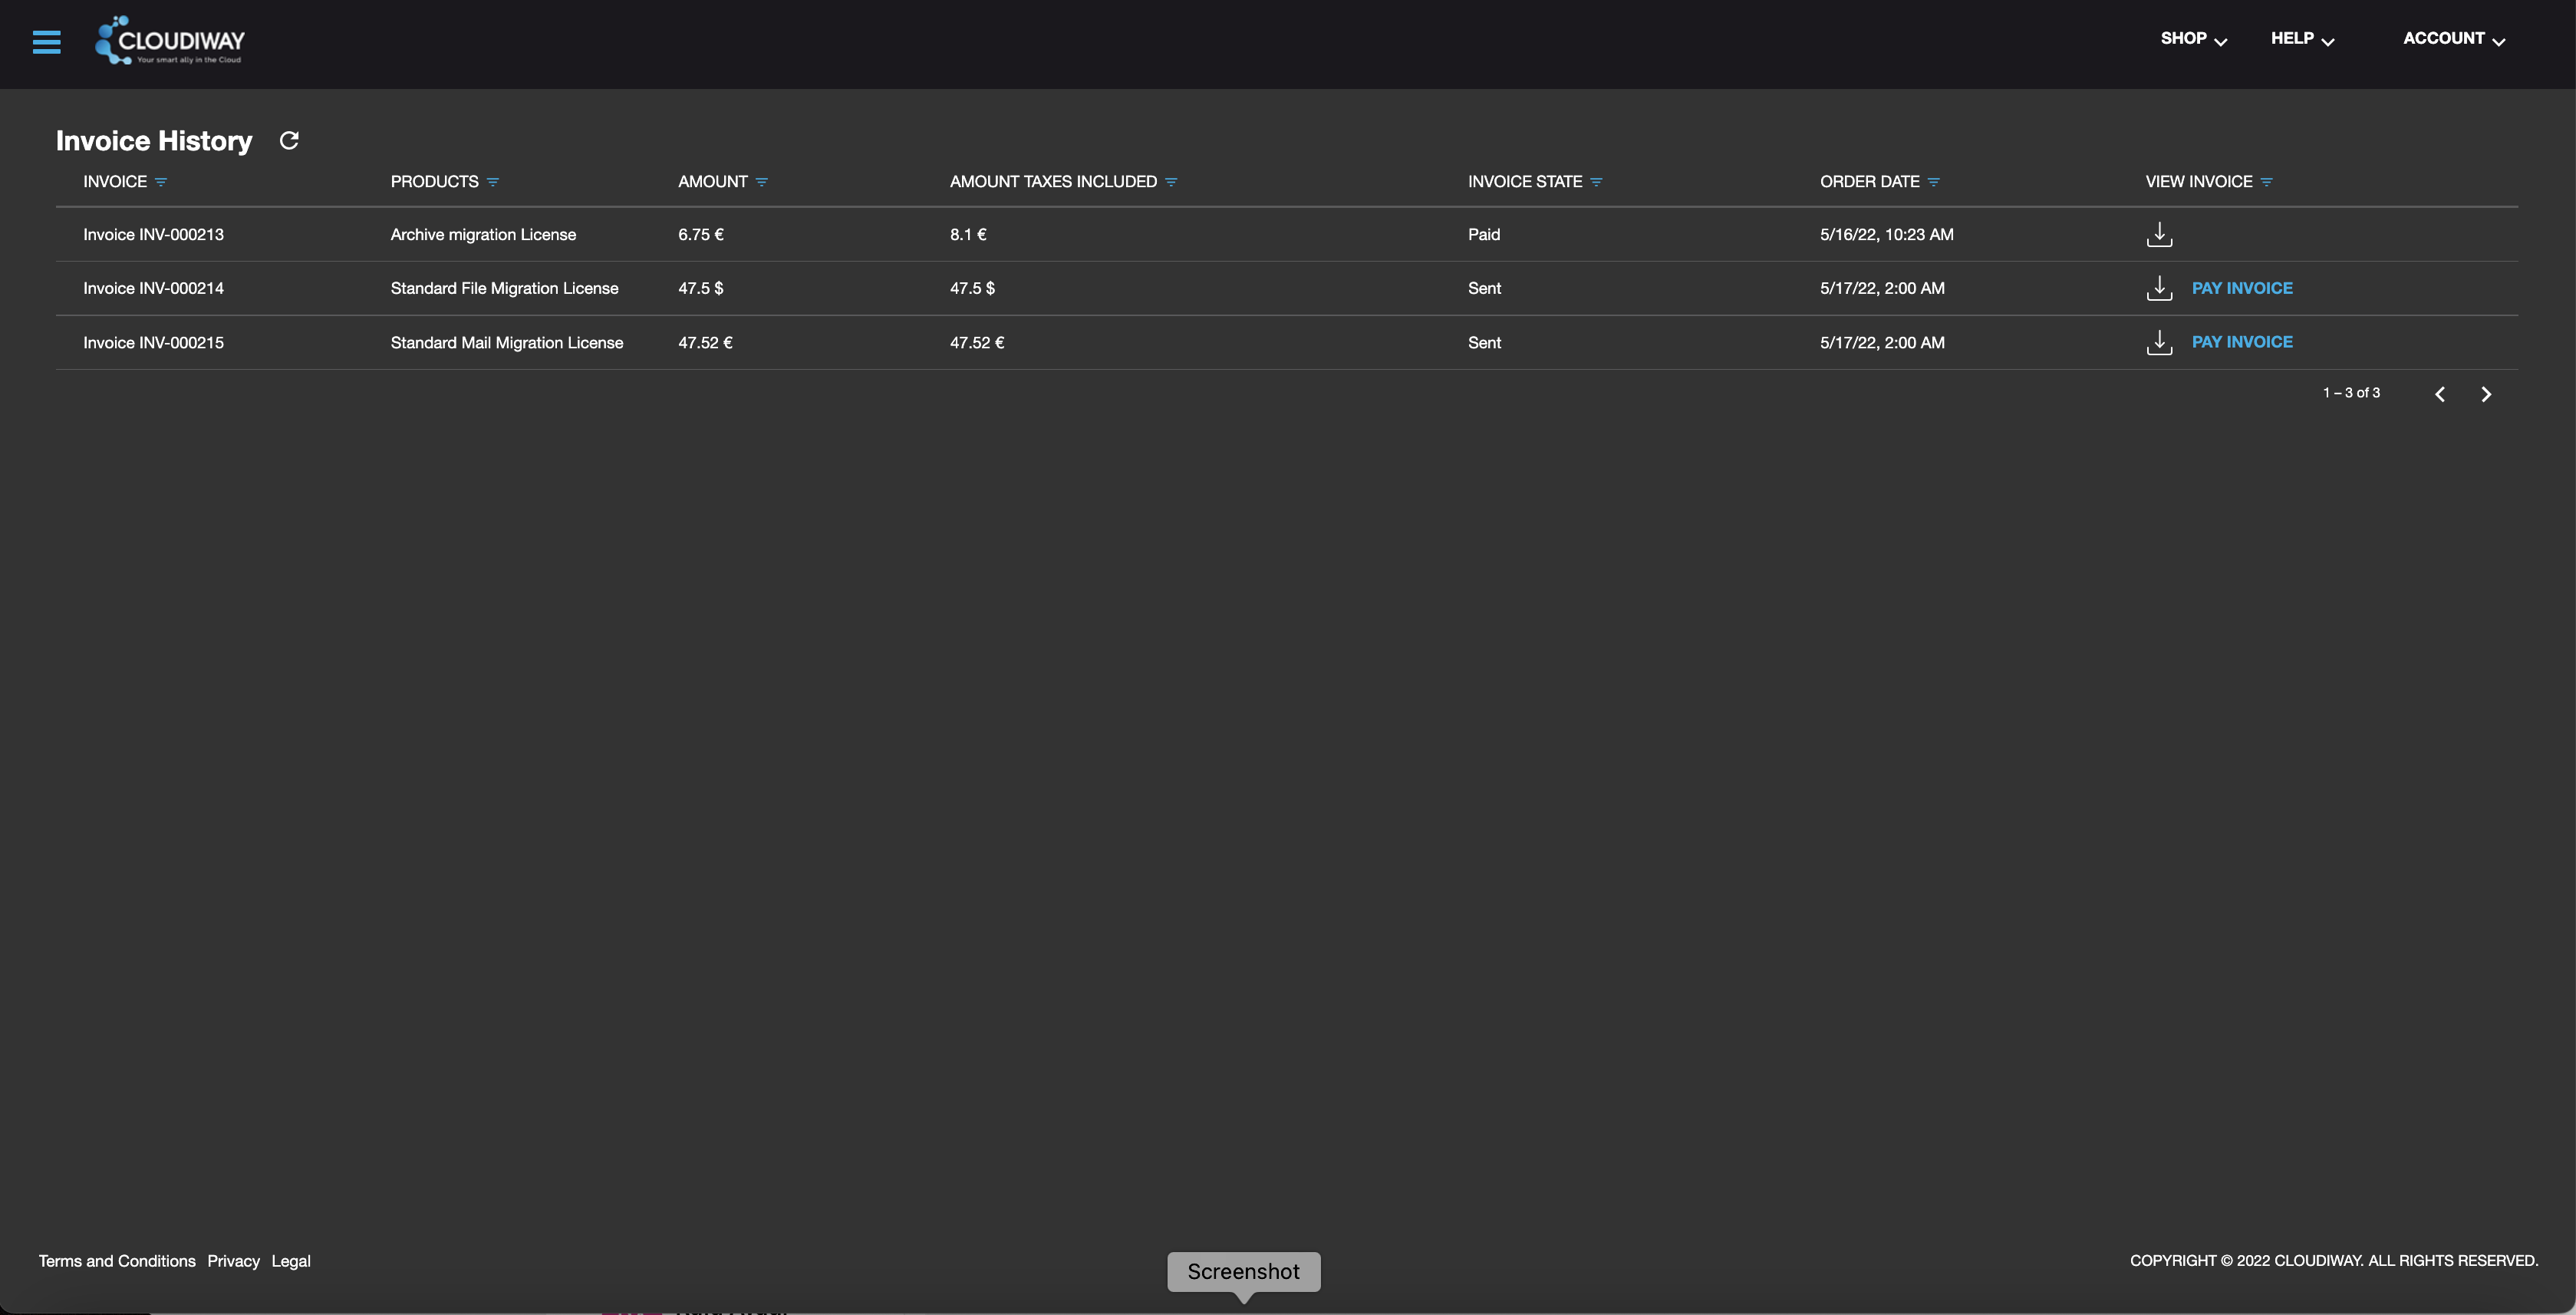
From the main screen, use the dropdown button SHOP then click on “Invoice History”.
Any Invoice sent to you will have “Pay Invoice” Against it. Click on Pay Invoice to proceed.
Once on the Billing Screen Click on “Next ” to continue.
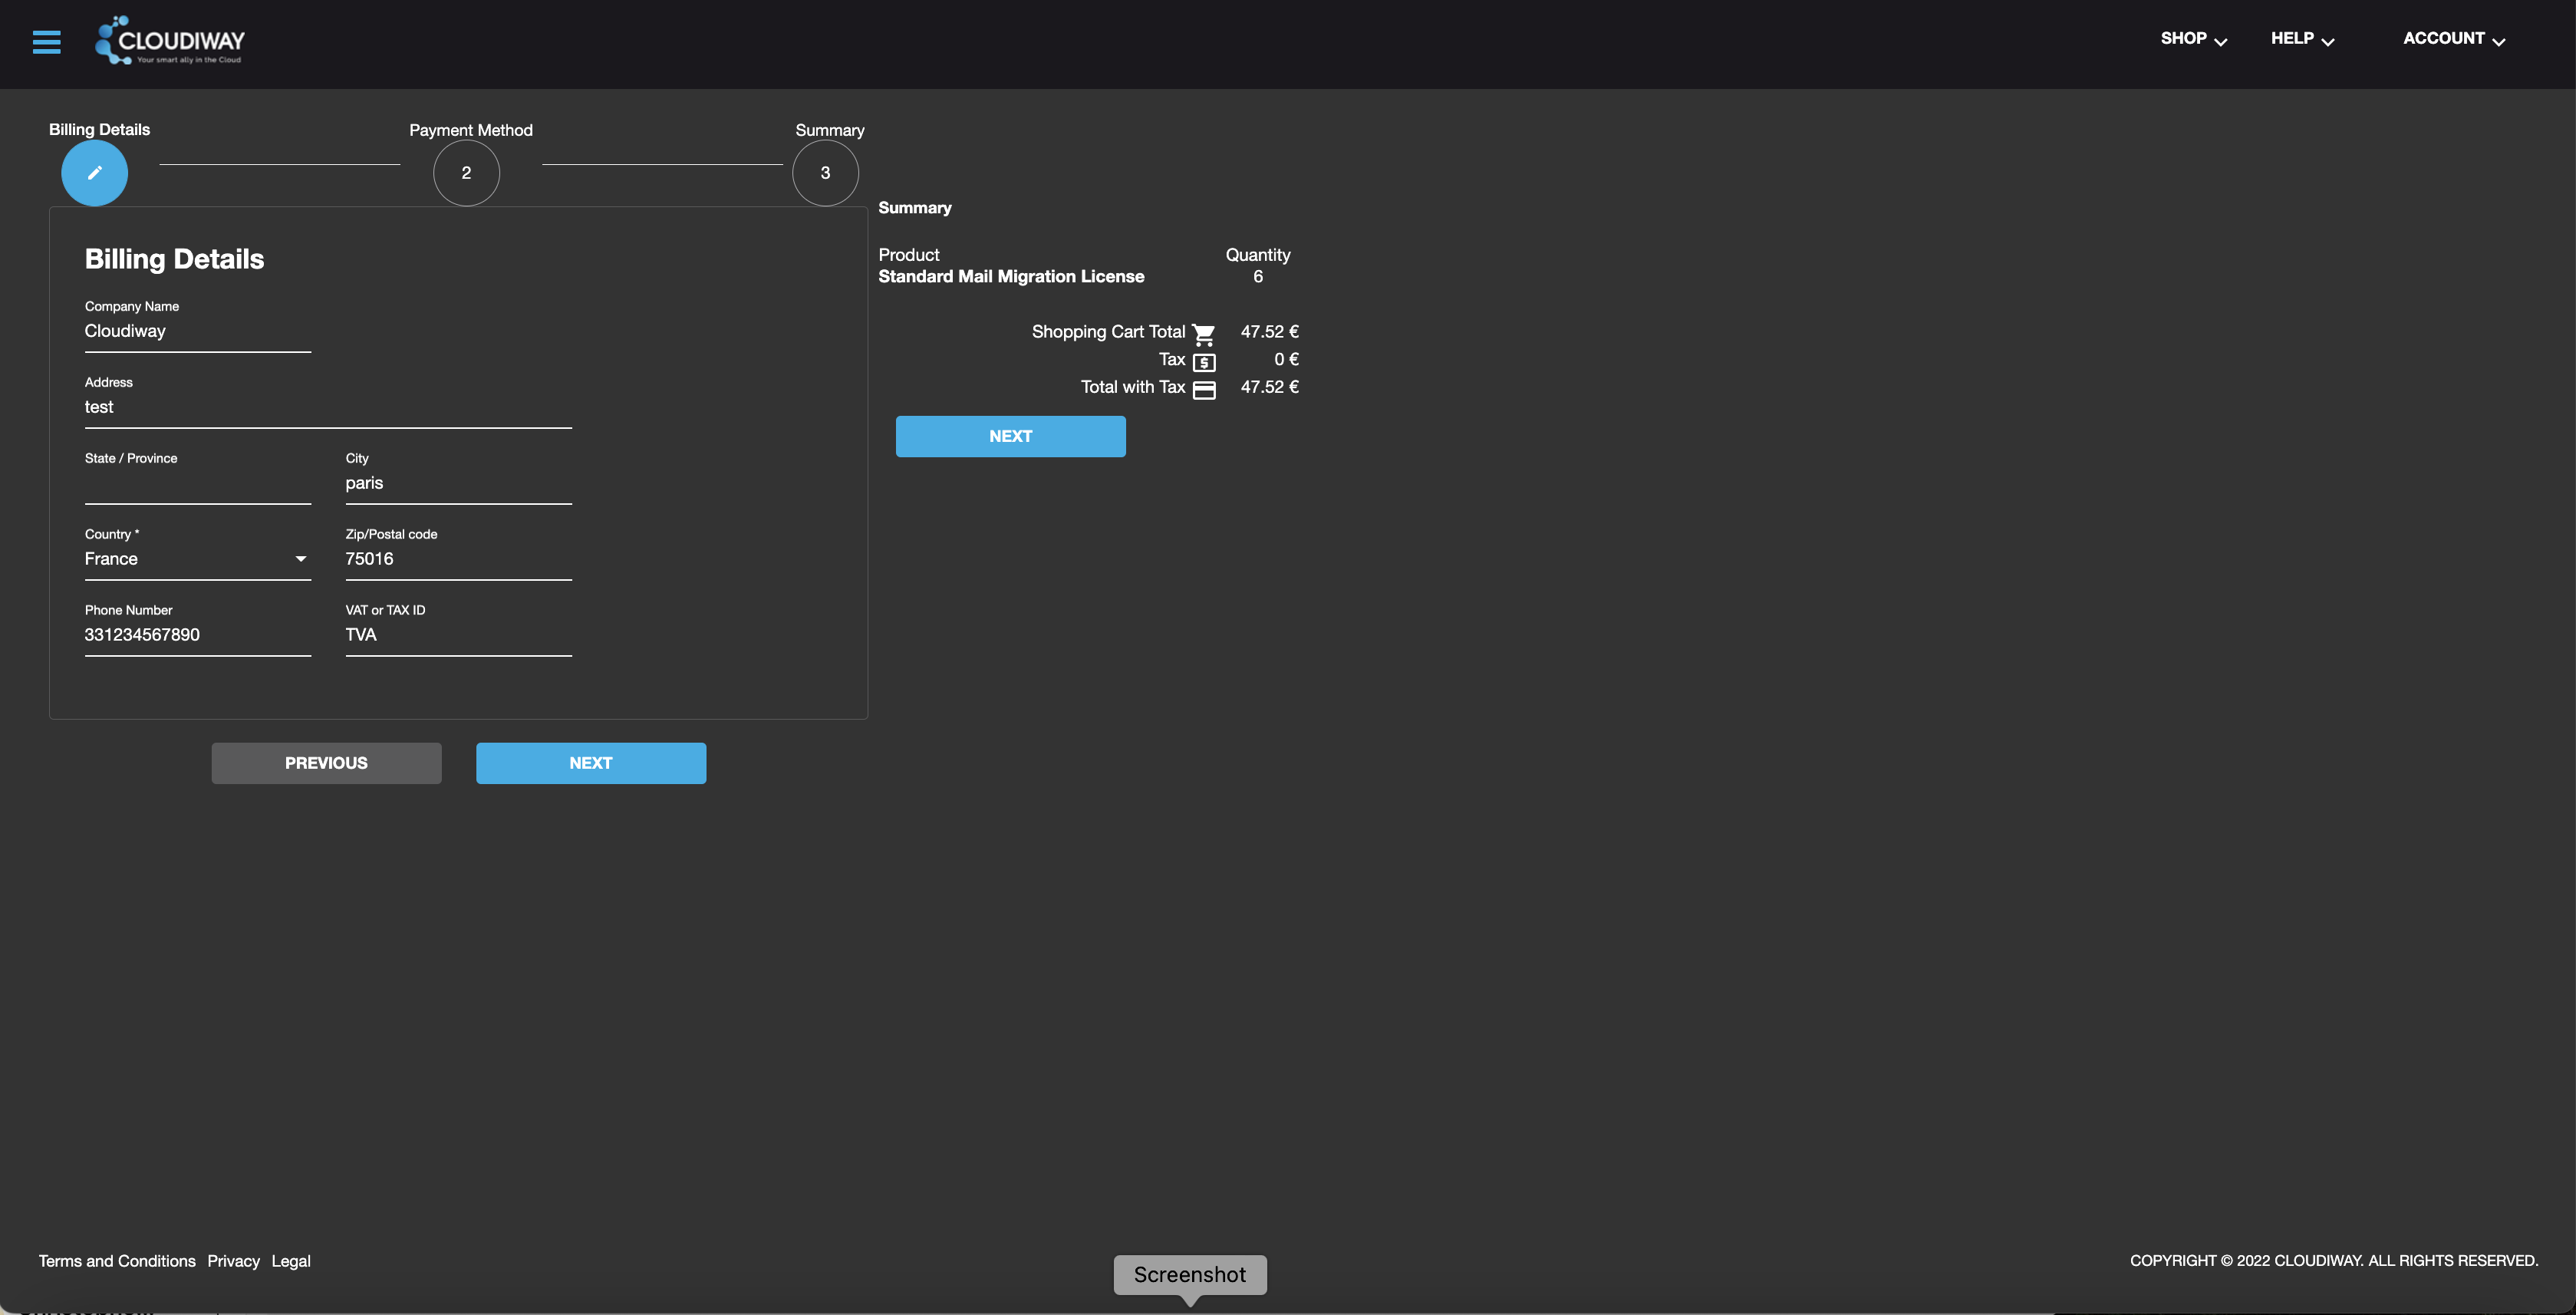
Choose the Payment method by clicking on the icon and proceed again to click on NEXT.
![]()
Press “Checkout” then fill in Payment Details and click on “Pay”.
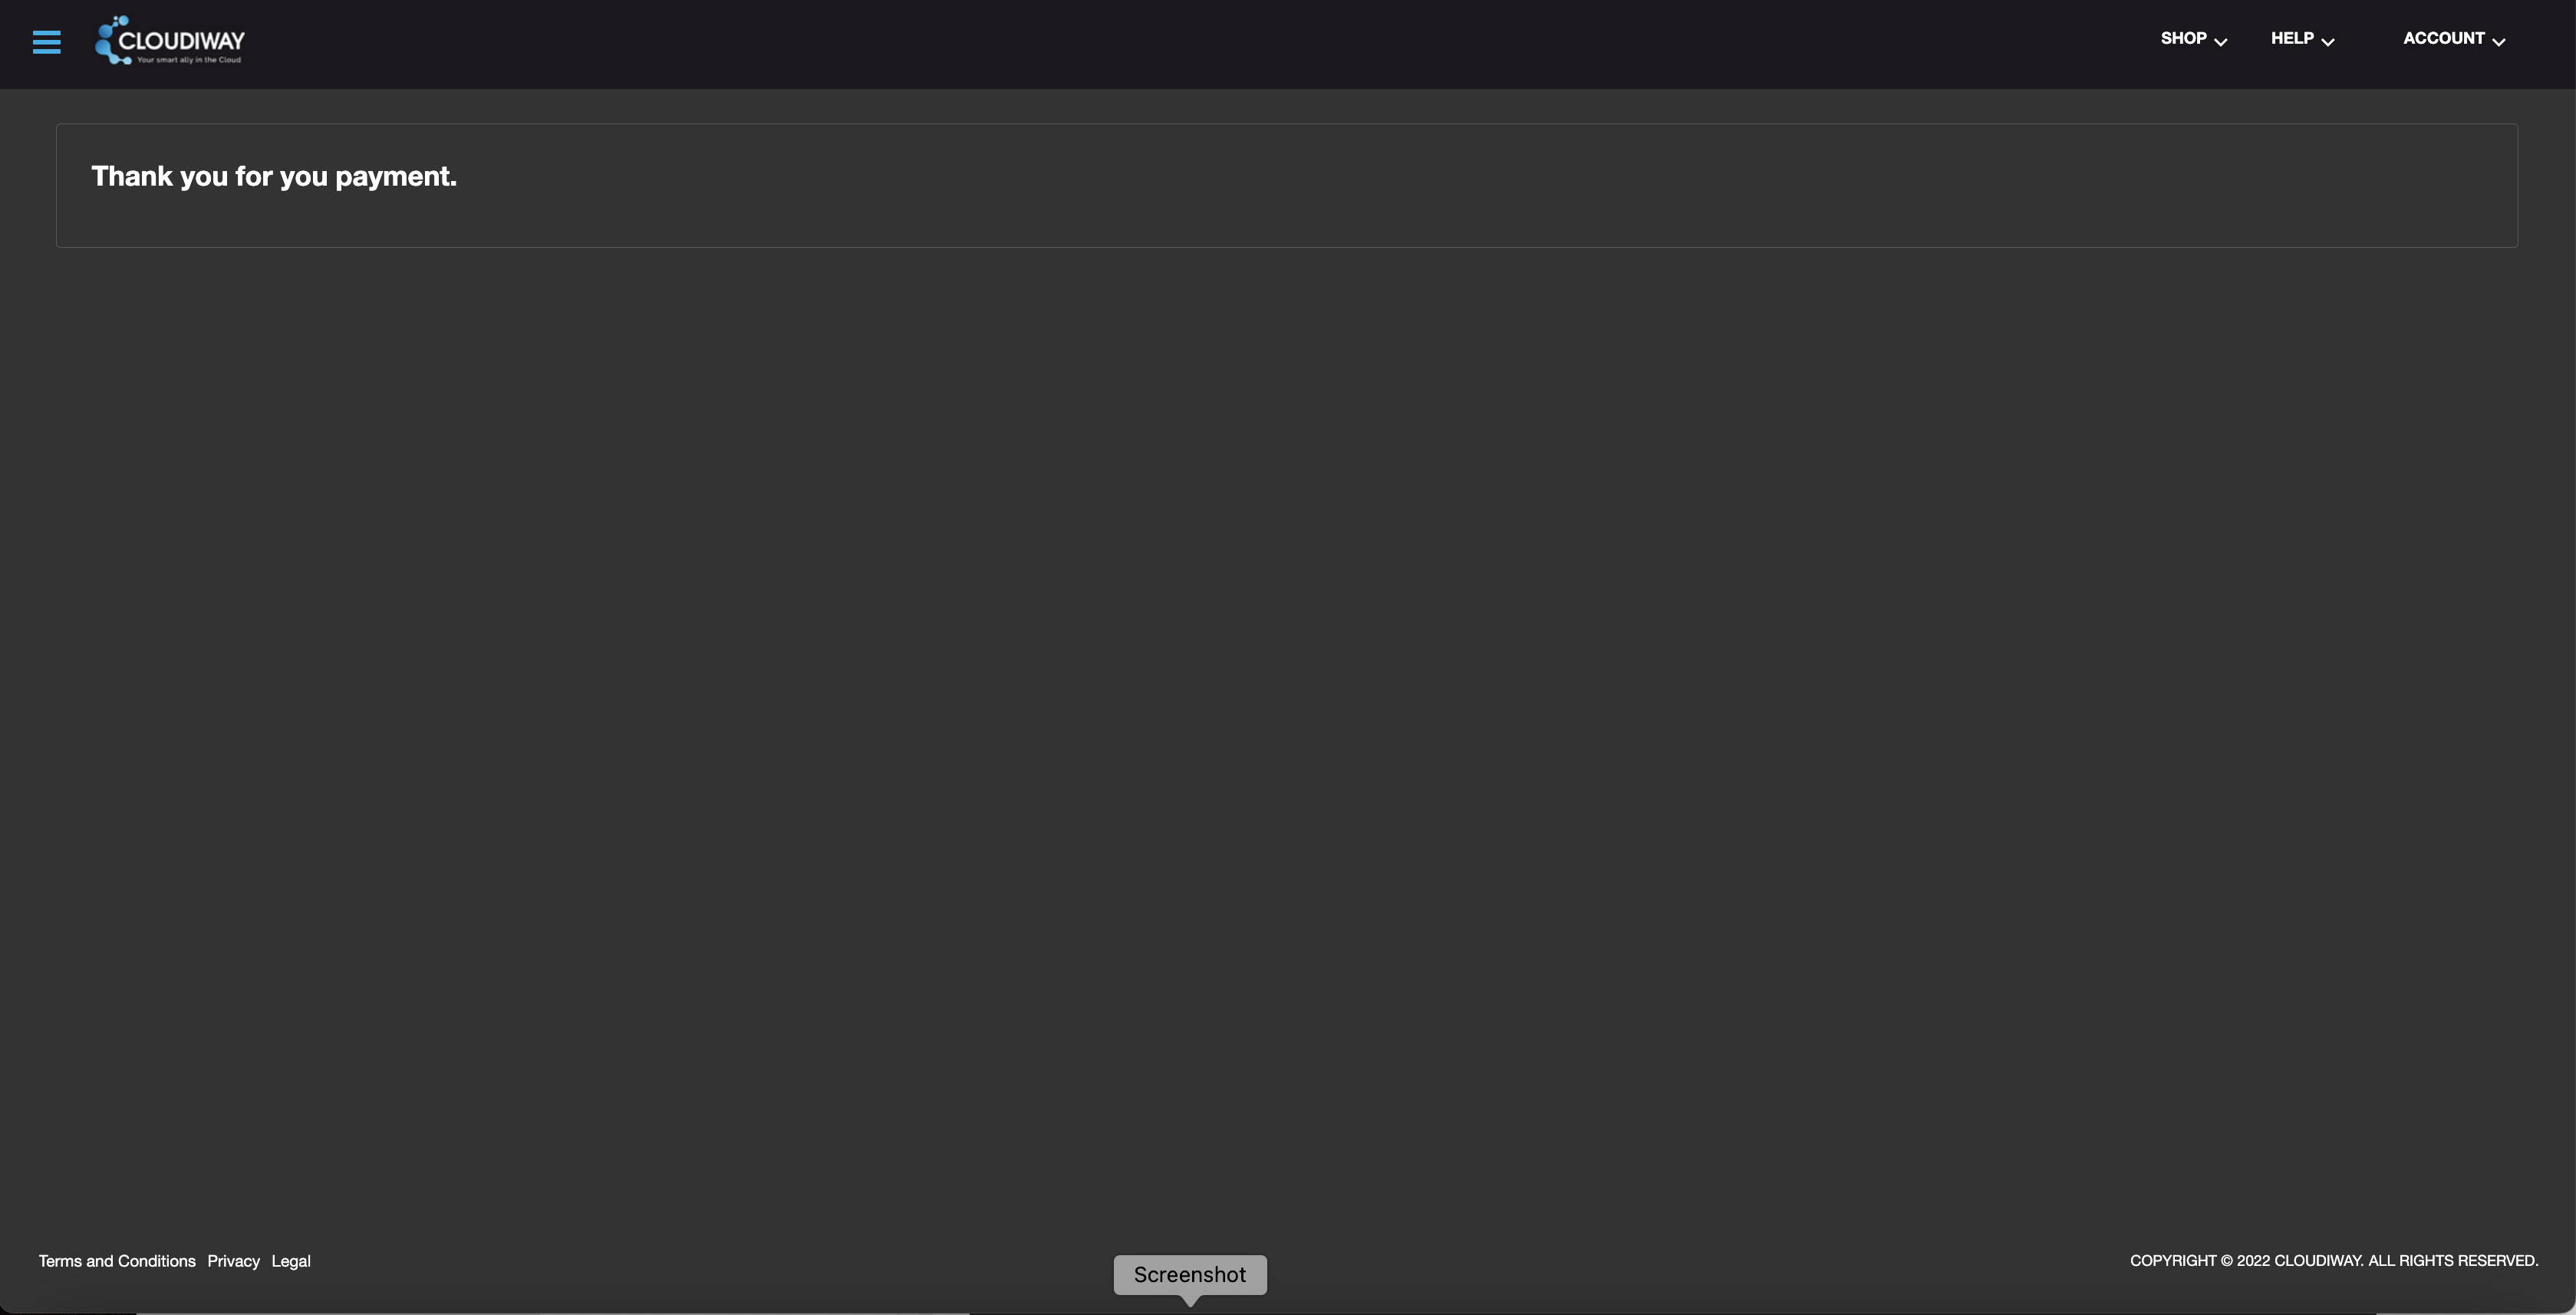
Once your payment has gone through you will be brought back onto your account. Here you will see a – Thank You for your payment – prompt confirming payment.
This concludes how to Pay an Invoice.