Create Provisioning Package to Join Azure AD.

This article explains how to create a provisioning package that will allow your Windows 10 and Windows 11 devices to bulk join Azure AD.

For this, we are going to use Windows Configuration Designer (WCD).

Note: Windows Configuration Designer has to be run from a device already joined to the Azure AD tenant.


Install Windows Configuration Designer (WCD) from Microsoft Store. Install Windows Configuration Designer
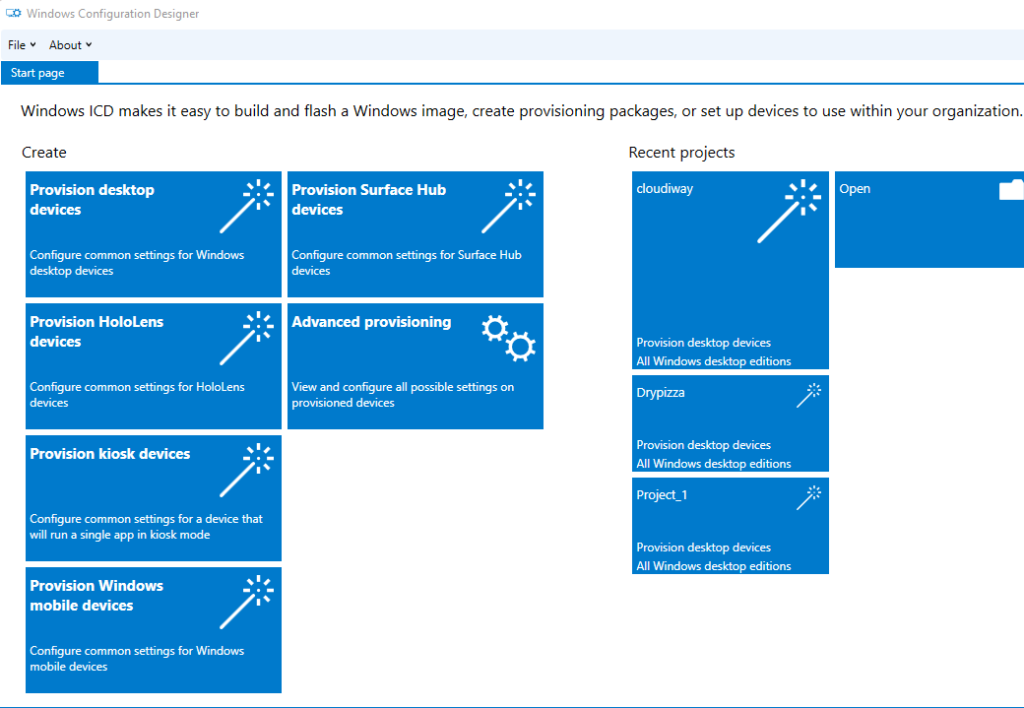
Start WCD and in the home page, Select Provision Desktop Devices Provision Desktop Devices
Enter the project details and click on Finish Cloudiway provisioning package
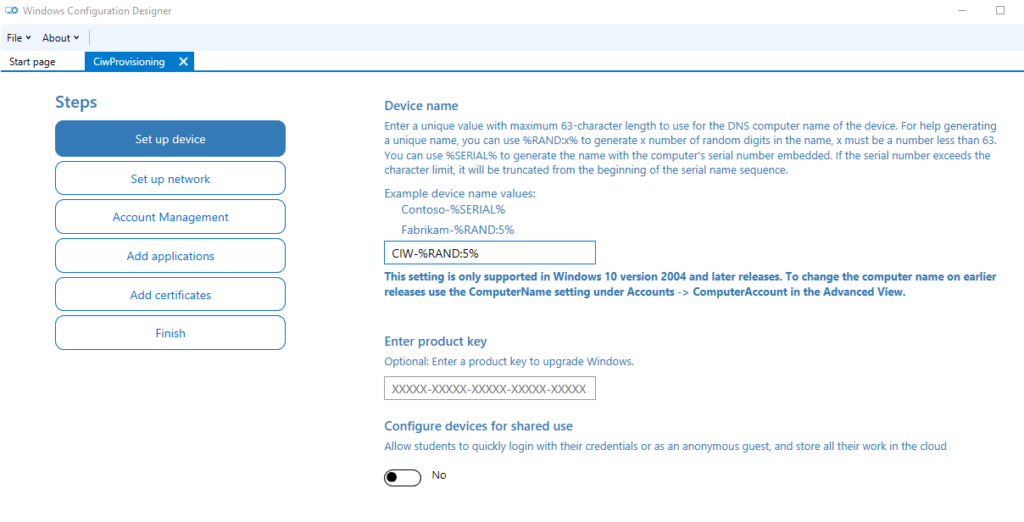
Step 1: Setup Device. Set the naming convention of the laptop.In our case it is CIW-%RAND:5%
We are not going to set any other option in this screen
Setup Device
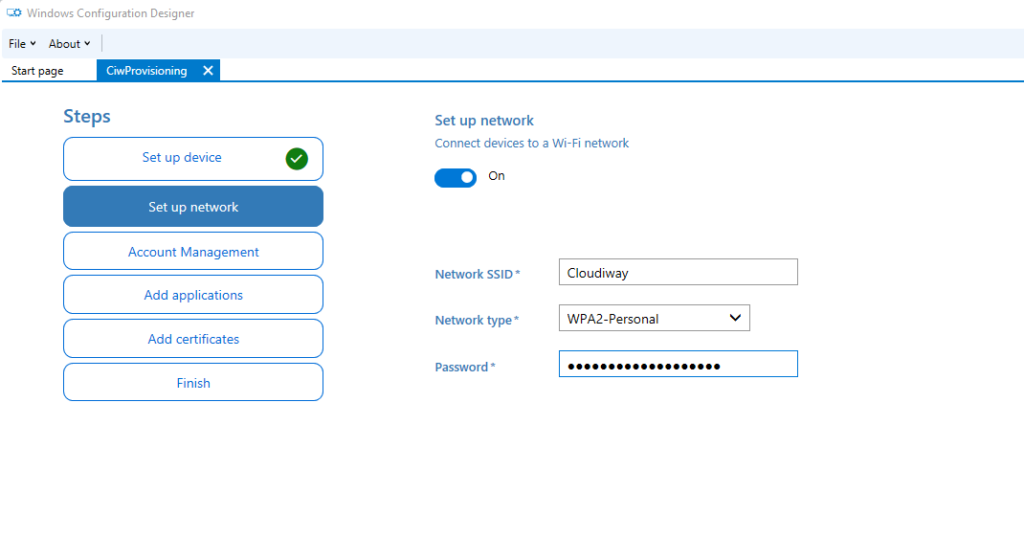
Step 2: Set Up Network. If needed, configure the WIFI settings Setup Nework
Step 3: Account Management.
Select Enroll in Azure AD.
Enter a token expiration date (that should correspond to the end of your deployment).
Click on Get Bulk Token.
This will redirect you to a browser and request you to login to your Azure AD tenant.
Generate the token.
Optionnally, configure the local admin account to create on the laptop.
Account Management
Consent.

If you are getting an access denied, it is probably because you are not in an Azure AD joined device.

consent
Applications and Certificates: We are not going to deploy appications or certificates.
Clikc on the Finish Tab anc click on Create Create Package

Before using it in the Cloudiway application, you must test it manually and verify that it is working.
For this, select a device and copy the provisioning package to this device. Double click on the provisioning package.
It will install it and reboot the computer.
After the reboot, in a command prompt, run dsregcmd.exe /status and verify that it is AD joined.

dsregcmd

Meet Cloudiway - A powerful migration and coexistence platform. We support Teams, G Suite, Office 365, Zimbra, Lotus, and more...
Register Now