Lotus Notes Connector Configuration
Configure the on-premises agent to migrate email from Lotus Notes/Domino to cloud platforms.
Lotus Notes Migration Architecture
Overview
The Lotus Notes connector enables migration from IBM Lotus Notes/Domino to Google Workspace or Microsoft 365. Unlike cloud-to-cloud connectors, Lotus Notes migration uses an on-premises agent that communicates with the Cloudiway platform through periodic check-ins.
How It Works
The agent runs on a workstation with Lotus Notes client installed. It periodically checks for migration jobs, processes mailboxes through the Domino server, and uploads content to the Cloudiway platform for delivery to the target.
Prerequisites
A workstation with Lotus Notes client version 8.0 or higher installed
The workstation must have access to the Domino server and internet connectivity
An account with access to source mailboxes for migration
Active Cloudiway account with mail migration project created
Step 1: Create the Connector
- Log in to the Cloudiway portal at portal.cloudiway.com
- Navigate to Connectors → NEW
- Select LotusNotes as the connector type
- Select Mail as the product type
- Enter a descriptive name for the connector (e.g., "Lotus Notes Source")
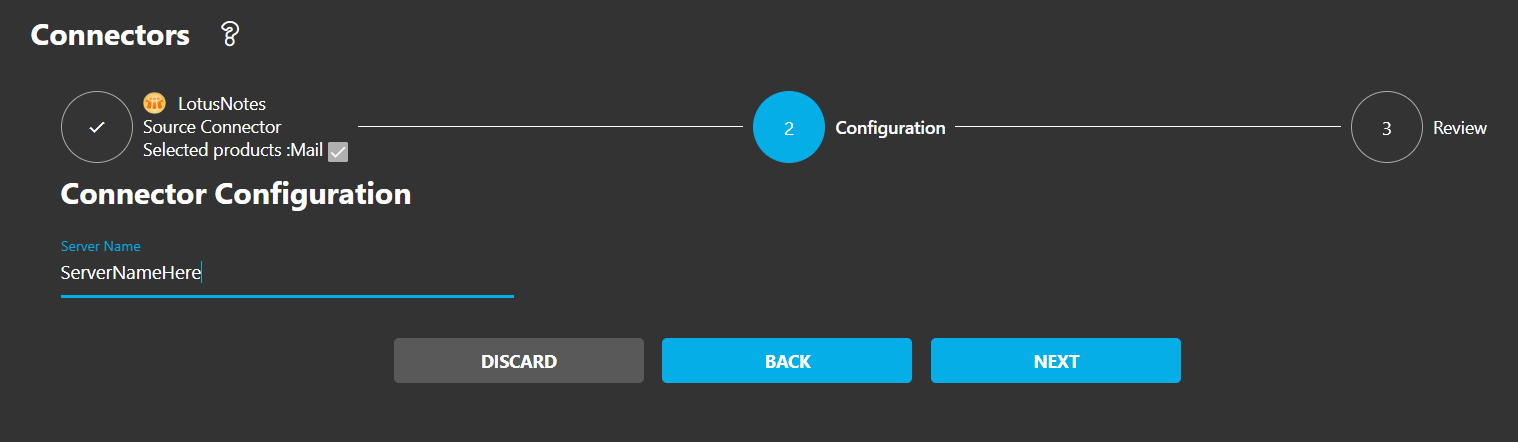
- In the configuration section, enter your Domino server name (case-insensitive)
- Click NEXT and then COMPLETE
Server Name
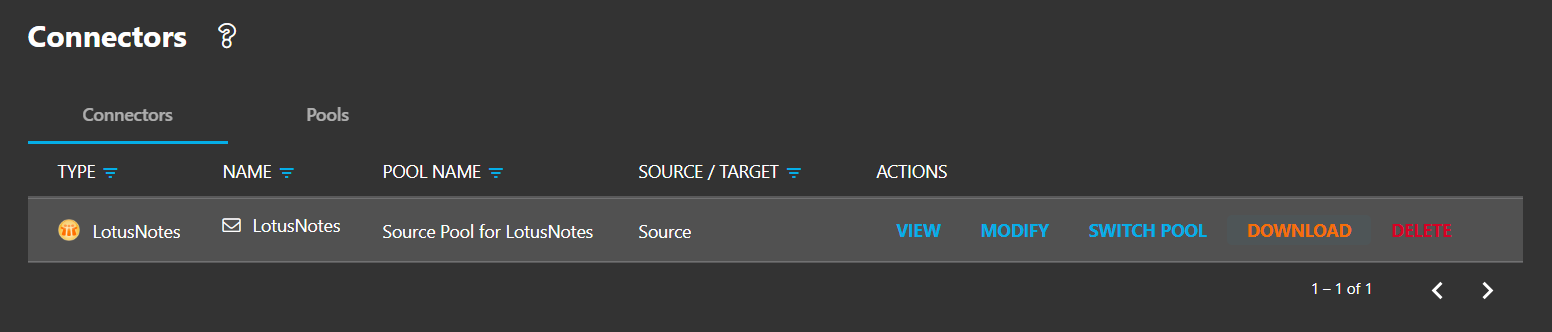
Step 2: Download Agent Files
After creating the connector, you'll need to download the agent components:
- After connector creation, look for the download options
- Download the agent executable (LotusNotesAgent.exe)
- Download the configuration file
- Save both files to your local machine
Step 3: Install the Agent
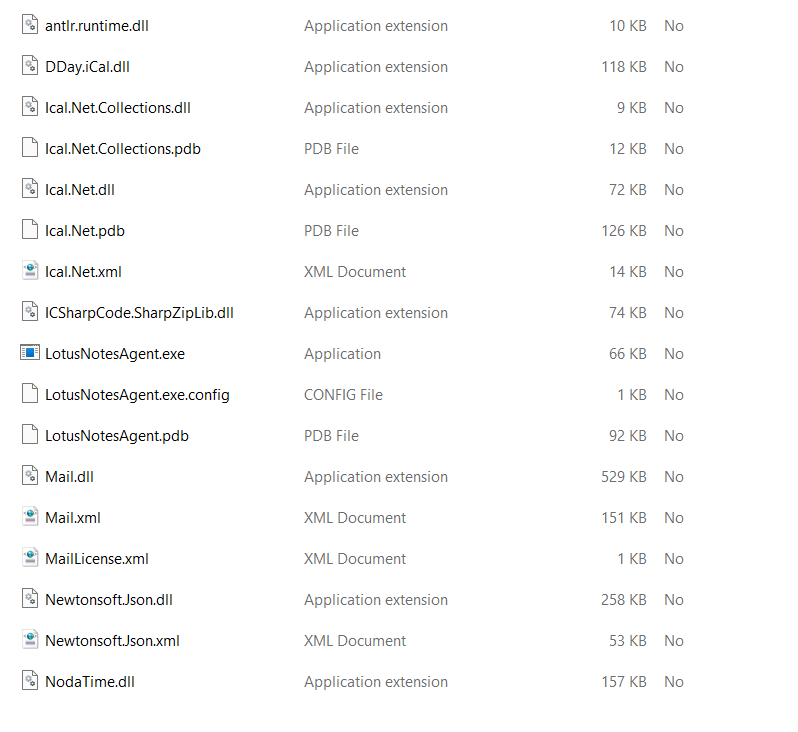
Extract Files
Unzip the downloaded files to a folder on the workstation with Lotus Notes installed.
Install Agent
Run LotusNotesAgent.exe and follow the installation prompts.
Verify Installation
Confirm the agent installed correctly and locate the configuration file.
Lotus Notes Client Required
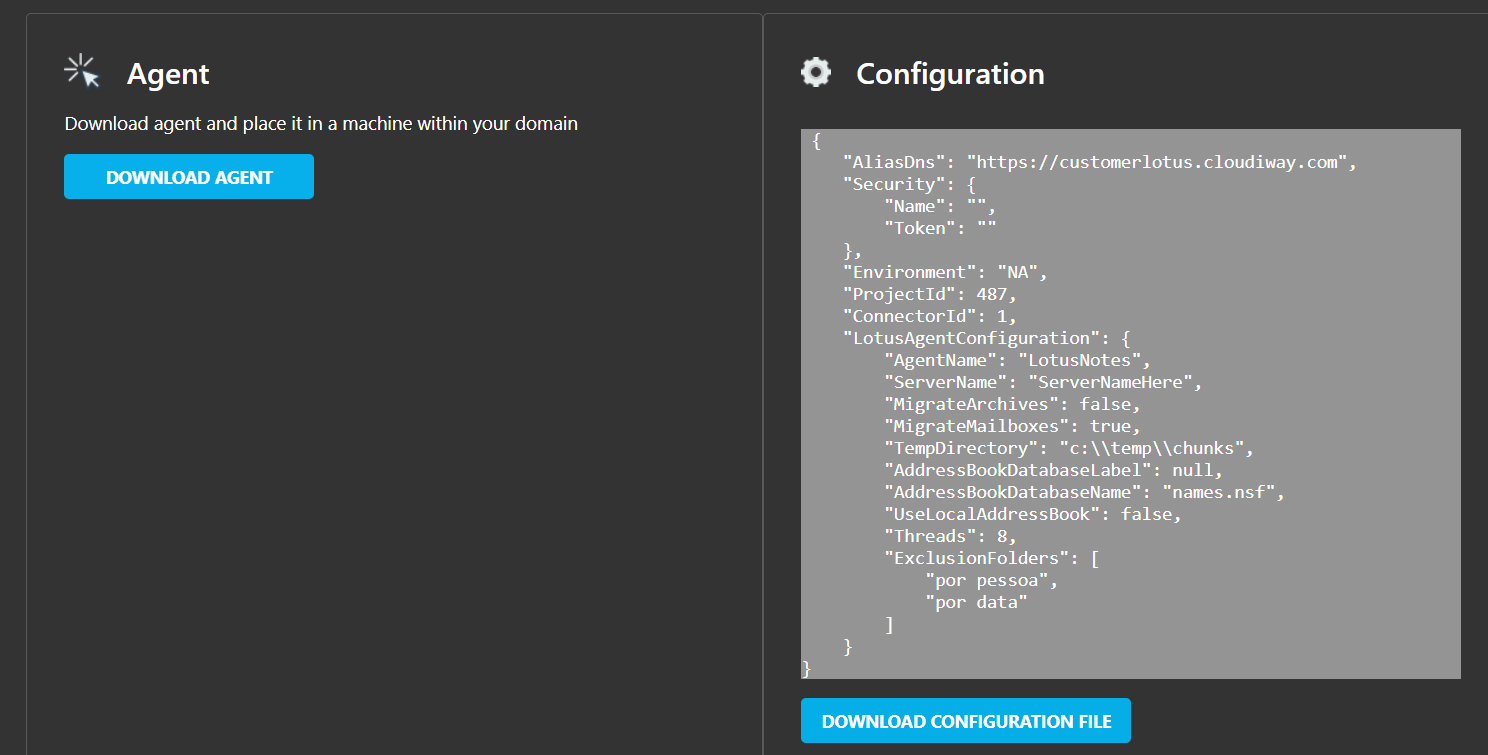
Step 4: Configure API Credentials
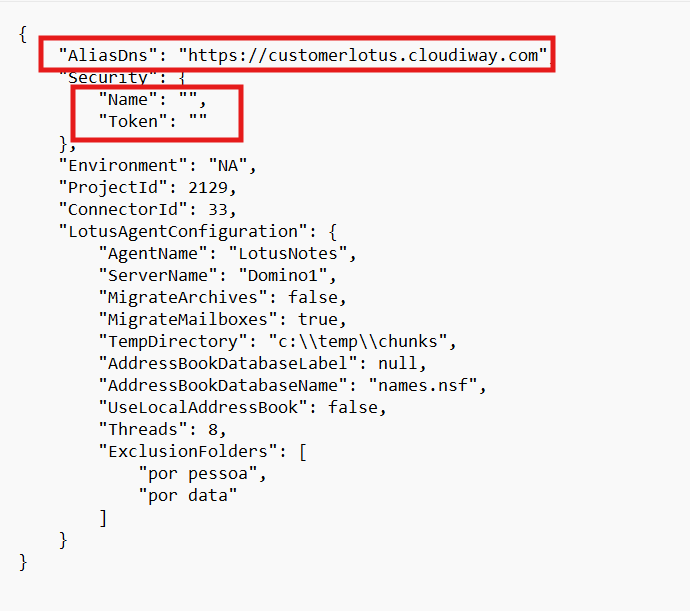
Update the configuration file with your Cloudiway API credentials:
AliasDns: https://newapi.cloudiway.com

Name: [Your Personal Access Token Name]

Token: [Your Personal Access Token]
Configuration Fields
- AliasDns: Always use
https://newapi.cloudiway.com - Name: The name you assigned to your Personal Access Token
- Token: The token value generated in the Cloudiway portal
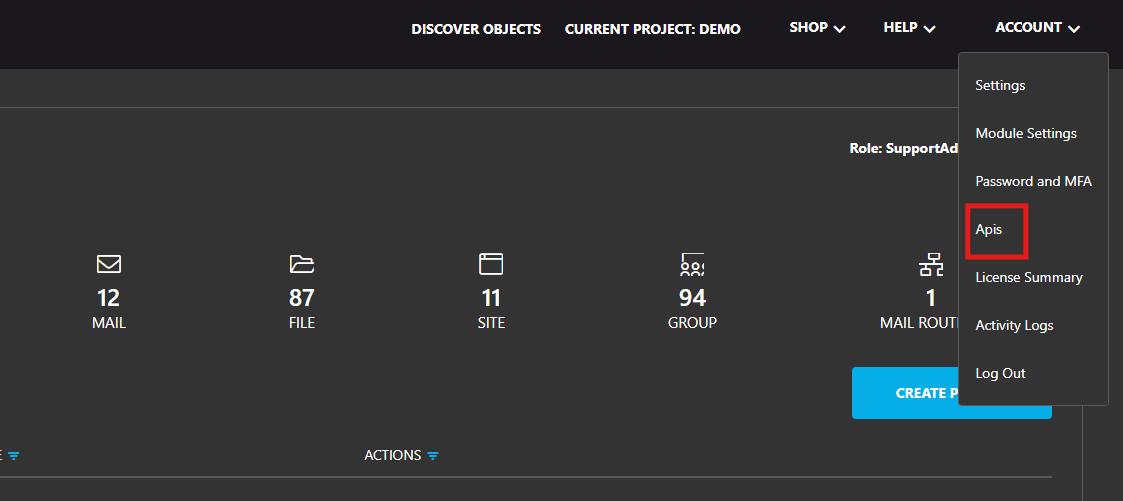
Step 5: Generate Personal Access Token
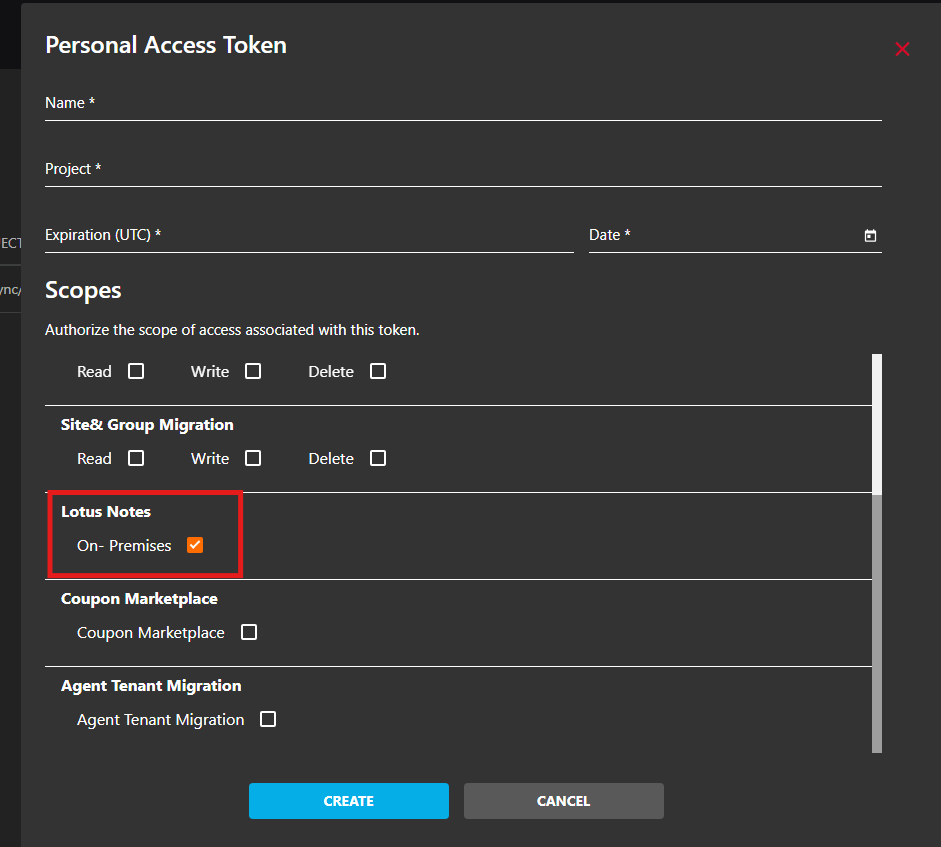
In the Cloudiway portal, create a Personal Access Token for the agent:
- Navigate to your Account Settings
- Go to the Personal Access Tokens section
- Click Create New Token
- Assign a descriptive name (e.g., "Lotus Notes Agent")
- Select the project this token will access
- Set an appropriate expiration date
- Enable the "Lotus Notes" permission
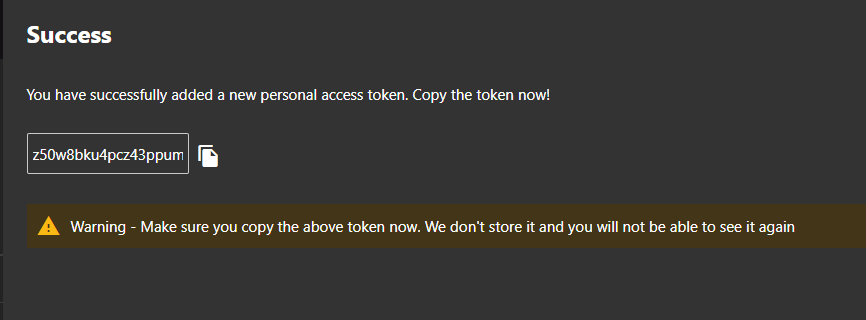
- Click Create and copy the token value immediately
Token Security
Step 6: Final Setup
Open Lotus Notes Client
Launch the Lotus Notes client on the workstation.
Authenticate
Log in with an account that has access to the mailboxes you need to migrate.
Close Notes Client
Close the Lotus Notes client. The agent will use the cached credentials.
Start Agent
Run the Lotus Notes Agent. It will begin polling for migration jobs.
Agent Running
Once started, the agent will periodically check the Cloudiway platform for pending migration jobs and process them automatically. Keep the agent running throughout your migration project.
Screenshots